


Automating Google Account Login |PyAutoGUI
AUTOMATING GOOGLE ACCOUNT LOGIN
What do you mean by automation?
Automation is something magical for us. This is one of
the technique of making a system, a process operates automatically.
Or in simple words, we can say it is the creation and application of technology that helps to monitor and control the services, production, and delivery of products. In our daily life, we are using many applications and tools which has automated our lifestyle.
But here we will discuss GUI automation. Almost all the programming languages have API’s to achieve automation.
Through this article, we will discuss one of the very interesting python libraries that helps to achieve GUI automation.
Topics that we will discuss through this article are:
- About Module
- Features
- Syntax of installation & importing
- Mouse Function
- Keyboard Function
- Image Matching & screenshot
- Explanation of the project.
- Code
- Output explanation
About Module:
The module which is provided to python For GUI automation is known as PyAutoGUI. Through this article, we learn how we can write a python script to control our mouse and keyboard to automate interaction with other applications.
This is a very simple designed API. PyAutoGUI runs smoothly on python 2.x as well as 3.x. It works on Linux, Windows, macOS.
Features:
- It helps to move or scroll the mouse.
- Clicking on the button.
- Typing in the windows of other applications.
- Helps to locate the application window.
- Displays the message box while the automation script runs.
- Set the cursor position.
- Helps to program a robot that can type at our keyboard and move the mouse for us.
- Take screenshots
- Match images with the part of the screen
Syntax of Module Installation:
pip install pyautoguiSyntax of Module Importing:
import pyautogui Mouse Function:
- position(): this function returns the current position of the cursor.
- size(): this function returns the size of the window screen
- onScreen(): It checks if the passed coordinate to it as arguments are on the screen or not.
- dragRel(): it helps to drag the mouse relative to the position that we pass to it as an argument.
- pyautogui.displayMousePosition():gives current mouse position but we can use it on the terminal.
- moveTo(): It takes three arguments x, y, duration. It helps to move the mouse at a coordinate position with a delay of duration.
- moveRel(): It helps to move the mouse relative to the current position of the mouse.
Keyboard Function: these are the function that helps to automate key pressing.
- typewrite(‘’): it types the string at current position.
- pyautogui.KEYBOARD_KEYS: it displays all the keyboard_keys.
- pyautogui.hotkey(): if we want to use a combination of keys for pressing enter then we can pass it as string arguments.
Image Matching and Screenshot:
- .screenshot(Path): it helps to get the screenshot.
- .locateOnScreen(Path): it helps gets the coordinate of the matched image.
Explanation of the project:
So from the above discuss we are now clear with the concept of GUI automation in python by using the PyAutoGUI library.
Now let's write code for Google Account Login Automation. To do so we don’t need too many functions because we just want to automate the login process.
The explanation of each line of code is provided within the comments. So prefer those things.
We just need to import the libraries, using typewrite function the link will be automatically typed on the bar when “Fn” will be pressed by the user the cursor will move to the bar.
And as we know it may take to load the https://account.google.com/signin so we used pyautogui.sleep() to wait.
And after that we used pyautogui.typewrite(‘\n’) is used to automate the login process after pressing “enter”.
When the google sign-in page will open the username will be typed automatically and after that to press next automatically we have again use pyautogui.typewrite(‘\n’).
So, it will automatically open the password page
and fill the password in the password field.
And at last then after waiting for a few seconds the google account will be logged in automatically.
Code:
#I have used my own google account username and password in another file and
# saved it as credential.py and then imported that file here.
#importing username from credential.py
from credentials import username
#importing password from credential.py
from credentials import password

#importing pyautogui
import pyautogui
# .sleep() with pyautogui suspends execution for given number of seconds
pyautogui.sleep(5)
#to click on address bar
pyautogui.write(['Fn'])

link="https://accounts.google.com/signin"
#.typewrite() function helps to automate the typing of string,
# we just need to pass the string which we want to type.
pyautogui.typewrite(link)
#this will type the link on the address bar when enter will be pressed by user
pyautogui.typewrite('\n')

#after typing it will suspend the program and wait to load the site.
pyautogui.sleep(30)
#this will type the username
pyautogui.typewrite(username)
pyautogui.typewrite('\n')
print("Typing Username")

pyautogui.typewrite(password)
pyautogui.typewrite('\n')
print("Typing Password")
pyautogui.sleep(30)

pyautogui.write(['Fn'])
website = "www.tutorialslink.com"
pyautogui.typewrite(website)
pyautogui.typewrite('\n')
pyautogui.sleep(30)

#thats all about the code
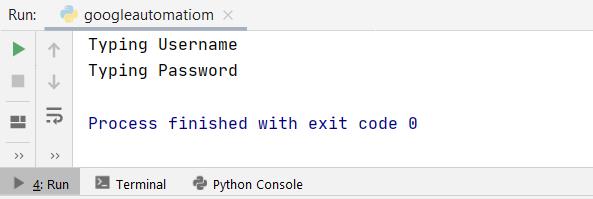
Output:
When the automation script runs you can see that message box on the terminal and can access your Google account easily.
Thank you so much for reading this article, hope you like it. If you want to learn more about GUI automation then does comment, in upcoming articles, we will have more discussion on automation and other python libraries too.
So till now,
Keep practicing.
Happy Learning.😊😊
