


REST API Communication and CRUD Operations in Blazor | Part 1
Making an HTTP Communication with any Web Application is a basic need and here in this chapter, we will do that step by step. Please code along with me and write me back your feedback or any other questions related to this Article. This is Part one of Blazor API Communications. Here we’ll have a few steps to do:
- Creating a Blazor Application.
- Get in REST API URL or Create new.
- Install Blazor HTTP Client Package.
- Create a Data Model.
- Create a Blazor service.
- Configure Blazor Service.
- Create Blazor Component for view.
- Build and Start debugging Blazor App.

So, without further delay let’s jump into Visual Studio 2019.
Step 1: Creating a Blazor Application:
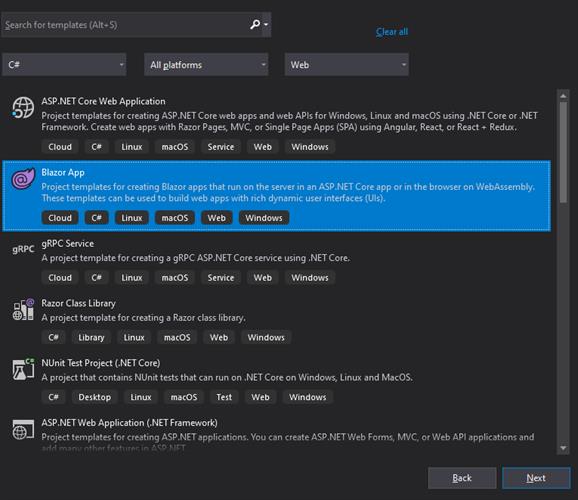
Step 1.1: Open your Visual Studio 2019 and select the option to a create new project with the template of Blazor. So, Search for Blazor template select this and go to next.
Step 1.2: Give a meaning full project name and solution name to your application as I have given to my Project (TutorialsLink.Blazor.APICalling) and Solution (TutorialsLink.Blazor).
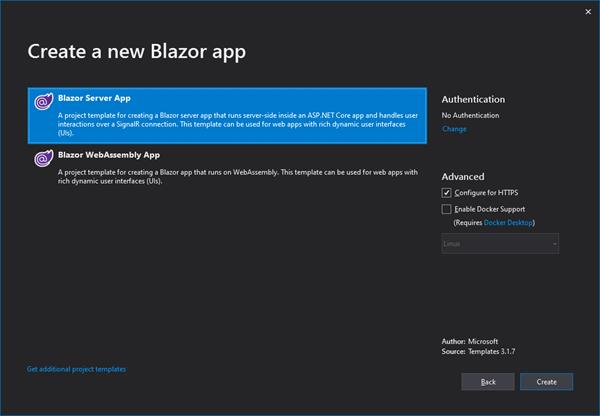
Step 1.3: Select Blazor Application type Blazor Server App or Blazor Web Assembly App which you like to work here in my sample I used Blazor Server App.
Step 1.4: Now we are good to go. You can see the default solution of Blazor Server Application in the below image or find yours in your solutions explorer.
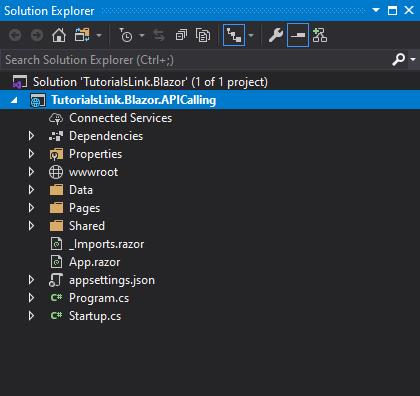
Note: We Will does not use any default blazor component or service here in this sample which comes default.
Step 2: Get in REST API URL or Create new
I have my one of my live API hosted on Azure Web App services and I’ll use this for now with the below URL:
https://nitinrestapi.azurewebsites.net/api/employees
This is an ASP.NET Web API project with all the HTTP Methods (GET/POST/PUT/DELETE).
Step 2.1: open your API URL in any Browser or Google Postman to check the JSON Structure, so that we can make a type-safe model at the application level.
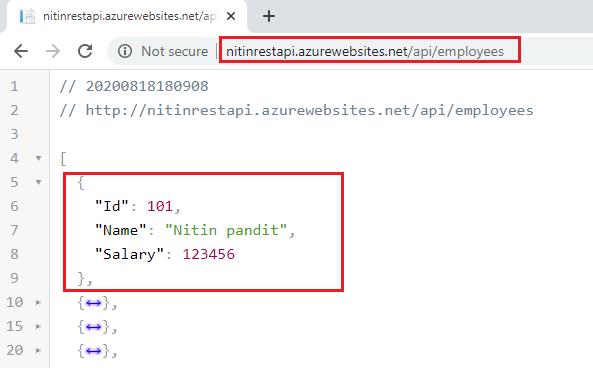
Step 2.2: I got my JSON and from there I found the structure for my model objects, as below:
{
    "Id": 101,
    "Name": "Nitin pandit",
    "Salary": 123456
}
Step 3: Install Blazor HTTP Client Package
In ASP .NET core Blazor Application we have “System.Net.HTTP” assembly to make https request but we have one more HTTP client Package for Blazor by Microsoft and it’s in pre-release version right now (Agu 2020).
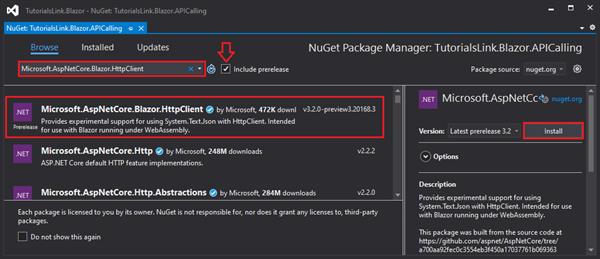
To get this package open NuGet package manager and search for “Microsoft.AspNetCore.Blazor.HttpClient” and don’t forget to click on the checkbox for Pre-release at the right side of the search box.
Once you get this in search, select this package and click to install.
Now, We are ready with all the requirements for this.
Step 4: Create a Data Model
You must have a folder in you project named “Data”, right-click on this and add a new class with a meaning full name for your model type, as I was given a name “Employee” to my model and create all the properties which I want to use in my application to read their values or store new values while creating a new instance for Http POST request.
namespace TutorialsLink.Blazor.APICalling.Data
{

    public class Employee
    {
        public int Id { get; set; }
        public string Name { get; set; }
        public int Salary { get; set; }

    }
}
Step 5: Create a Blazor service
As we know Blazor allows us to create Injectable Services to achieve DI (Dependency injection) also loosely coupled code using C# Classes. So, here in this Step, we’ll create Blazor Service Contract as Interface and it’s an implementation in the class.
Step 5.1: Add a folder with the name “Services” in the root of your Blazor web application project. Step 5.2: Add a new interface file in the services folder with the meaning full name, as I have given “IEmployeeService.cs”.
Step 5.3: Here we will write all the abstract functions that we may need in my application for reusable logic. For now, I have just added one function that will have a definition in the implementation section for making an async HTTP request and for returning the JSON, as in the below image: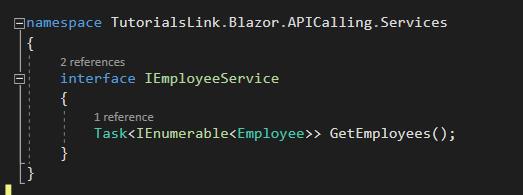
Step 5.4: Now, create one more class file “EmployeeService.cs” to implement the above service interface and implement the “IEmployeeService.cs” here.
Step 5.5: Create an instance for HttpClient and initialize it in the constructor with a HttpClient Parameter, this parameter will be passing here by Dependency Injection Container at runtime.
private readonly HttpClient httpClient;

public EmployeeService(HttpClient httpClient)
{
            this.httpClient = httpClient;
}
Step 5.6: Now in the GetEmployees() function we will make an HTTP GET request to “api/employees” and will return the accepted JSON from API result. as it’s an async function so with await statement we’ll call GetJsonAsync<>() function. This function will come from the package we installed in Step 3 so don’t forget to use the namespace “using Microsoft.AspNetCore.Components;” with other using statements.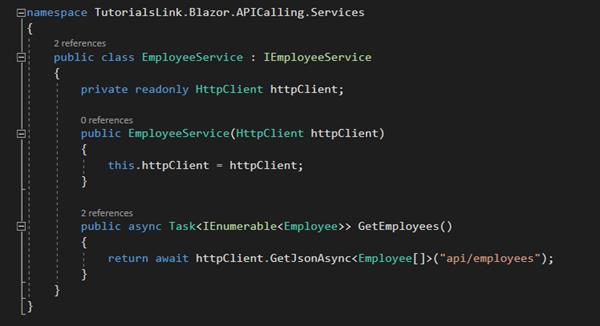
Step 6: Configure Blazor Service
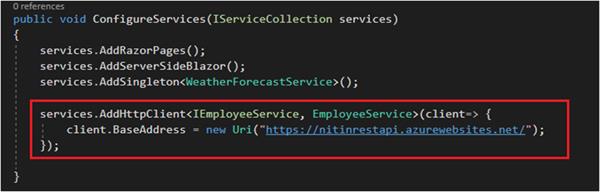
Open Startup.cs file from the root folder of your Blazor Application and add your Blazor Service IEmployeeService with it’s implemented class EmployeeService in ConfigureServices() function and pass a HttpClient object with your API Endpoint path on BaseAddress:
services.AddHttpClient<IEmployeeService, EmployeeService>(client=> {

                client.BaseAddress = new Uri("https://nitinrestapi.azurewebsites.net/");

            });
Refer to the image below:
Step 7: Create Blazor Component for view
Now, we are ready with API logics at my application and just need to call this in the component so we can bid the JSON in our DOM.
Step 7.1: Right-click on pages folder and add a Class file and Razor component so that we can write BL in Class file and UI in Razor component (.razor) separately.
I have added EmployeeListBase.cs and EmployeeList.razor in my application and now follow the steps as given in the below image:
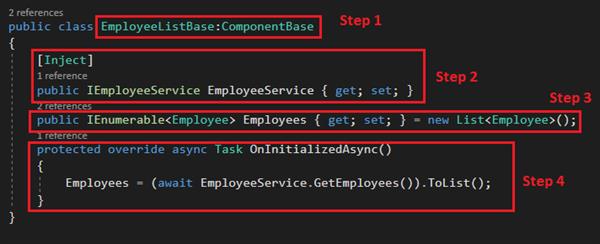
- In EmployeeListBase class, inherits ComponentBase to make this a component class.
- Declare property with the type of your Service Contract and use [Inject] attribute over this. Here in Blazor we only [Inject] for injecting a dependency.
- Declare a property with IEnumerable<> collection type, which can contain the JSON data returned by API in the form of a generic and type-safe collection.
- Use OnInitializedAsync() from component lifecycle events to make an API call when your component is Initialized.
Step 7.2: Now, we will add the required code in our Razor component, follow the given steps in the below image:
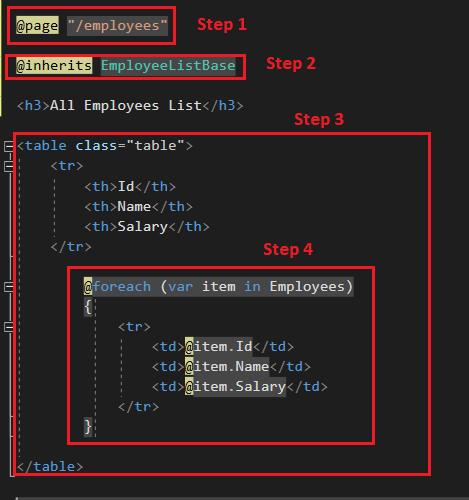
- Add the page route value using @page.
- Inherits the Base class file for this component using @inherits.
- Create an HTML table structure that matched with your structure.
- After OnInitializedAsync() we’ll have all the data in our IEnumerable<> collection. Make a loop and render it in your DOM elements.
Step 8: Build and Start debugging Blazor App
Finally, we are ready with our blazor application to start for debugging and testing. Press Ctrl + F5 and run your application. For now, we don’t have any option in the left side menu to navigate to employees, so we can add “/employee” in the URL and I trust you’ll have the same view as below: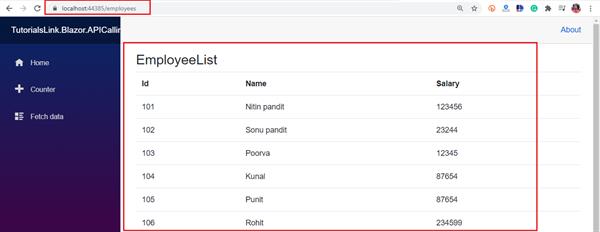
I hope this will help you to read the data from your REST API. In the next articles will do more operations like Delete, Edit, and Update.
