


System restoration in Windows 10
Each time you install any software on your PC a system restore point is made in the windows registry. Windows 10 is an operating system that allows you to restore your system from a previous point with previous files and operating system settings. The Windows 10 system is restored from the point where a system restore point was created. It is highly recommended to create your PC’s backup image.
System restore is used for system security and restoring the previous settings of your Windows 10.
Follow these easy steps to restore your Windows 10 PC:
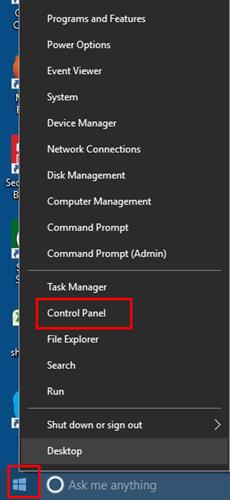
- Open Control Panel
Hit the right click on the Windows button and then choose ‘Control Panel’. You can also use a shortcut key i.e. Window +S and then type Control Panel and hit Enter.
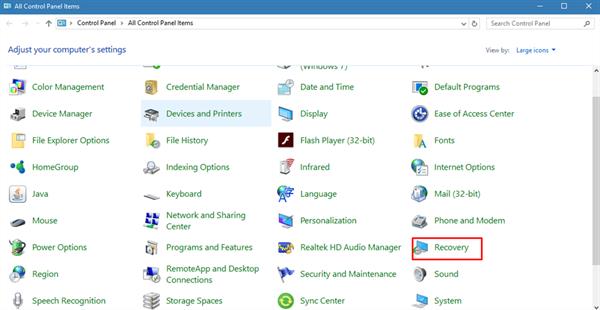
- Recovery
After you have entered in Control Panel window, click on ‘Recovery’.
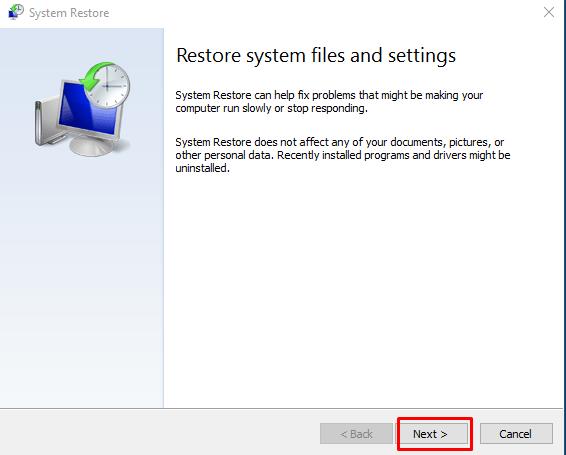
- Open ‘System Restore’
In the Recovery window, you’ll see three options. Click on ‘Open System Restore’.

4. Restore Your Settings
Once you have clicked on the Open System Restore button, a pop-up window will open with the name of ‘Restore System Files and Settings’. Click ‘Next’.
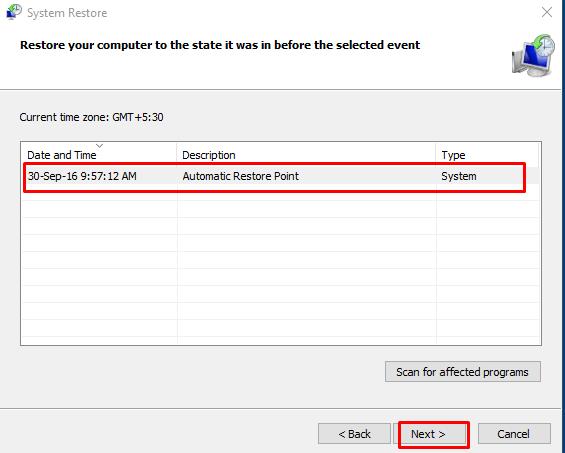
- System Restore
In this step, you’ll see a list of system restore points along with the date and time.
Click on your choice of ‘System Restore Point’. Hit the ‘Next’ button.
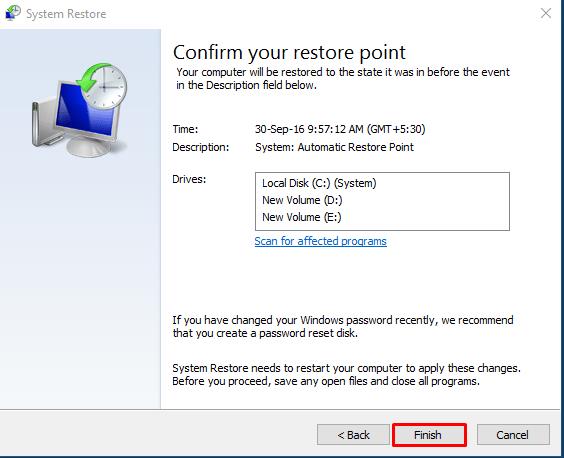
- Finishing the ‘System Restore’
After you are done with the selection of your system restore point, click on the ‘Finish’ button to confirm your choice and start the restoring process.
Please note your system can restart various times during this process, please do not power off your PC during this time.
Generally, it takes around 20-30 minutes to restore your PC. Completed the process! Congrats, you are all set!!
