


Installation of Azure SDK and Blob Storage in Azure
In this article, we will learn about Azure SDK and Storage Account in Azure, how to store images in Blob storage to Azure. So, let's start with the following three steps:
- How to install Microsoft Azure SDK in Visual Studio 2017?
- How to install Azure Explorer?
- How to create Storage Account in the Azure Microsoft Account?
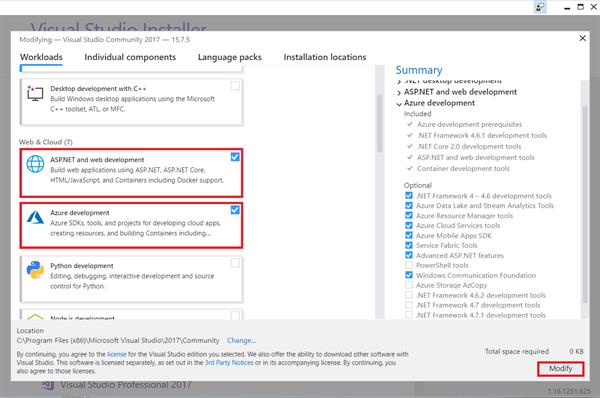
When you are installing the Visual Studio 2017
- Select the options given in the Screenshot so that it will automatically install the Azure SDK.
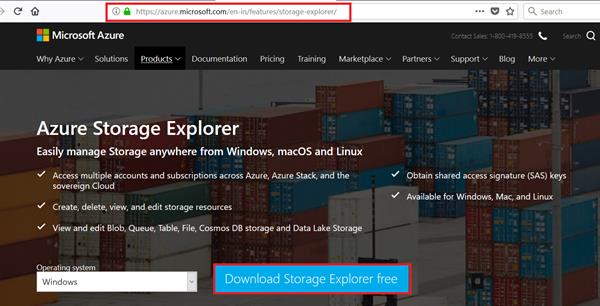
Azure Explorer: Azure Explorer is a free Microsoft Azure storage tool. In this, we can manage all our Microsoft Azure blobs at a commonplace or one place. Azure Storage Explorer is a useful GUI tool for inspecting and altering the data.
For the installation of Azure Explorer, we need to go to the given link.
- https://azure.microsoft.com/en-in/features/storage-explorer/
- Click on the Download Storage Explorer which is available free.
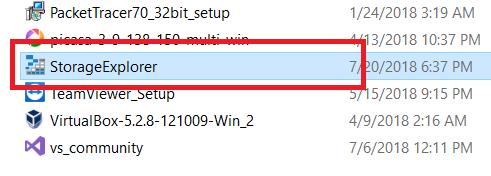
- After downloading the Storage Explorer will look like in the Screenshot.
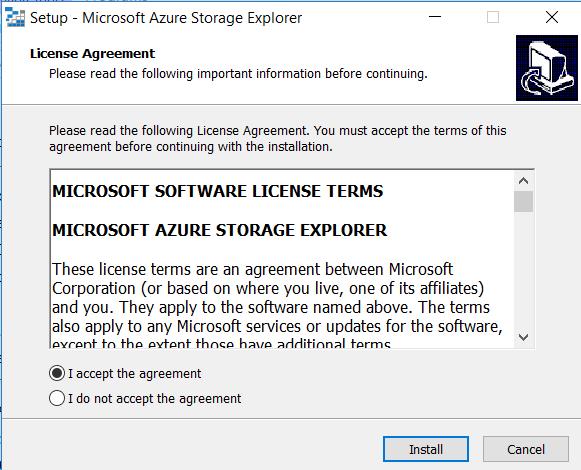
- Click on the I accept the agreement and click on Install.
- Click on Next for the further step.
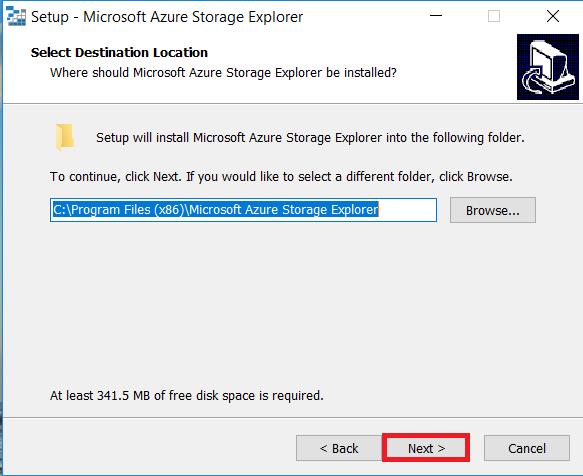
- Click on Next for the further step.

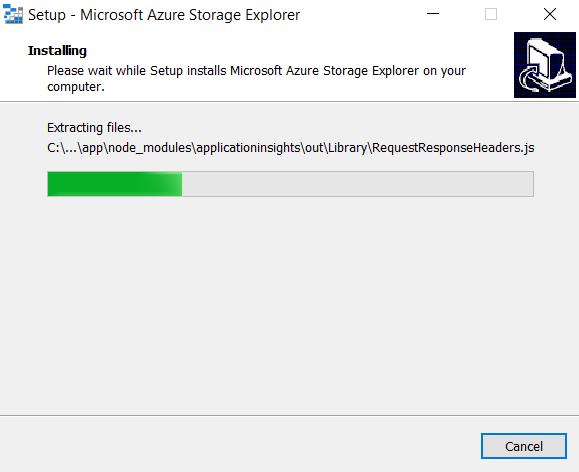
- It will start installing automatically.
After completing the installation, just go in the search box and type Azure Explorer and open it. Here we need to add our account with the Azure Explorer, so before you add your account you will get as shown in the Screenshot and click on the red marked area.

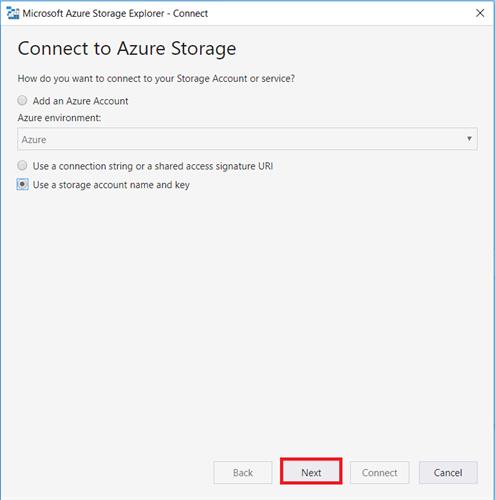
So, in the following figure it will provide you with different options to connect with the storage account, here we need Connect to Azure Storage ―Use a Storage Account name and key.
- Click on ―Next
So, next window will ask you about ―Account Name and ―Access Key. Provide the storage account name and storage access key. You will get this information from your Microsoft Azure Account.

- Go to your Microsoft Account login where you can get the name and key from your storage account. So, for creating a storage account, you need to go to New, Data + Storage, then Storage account.
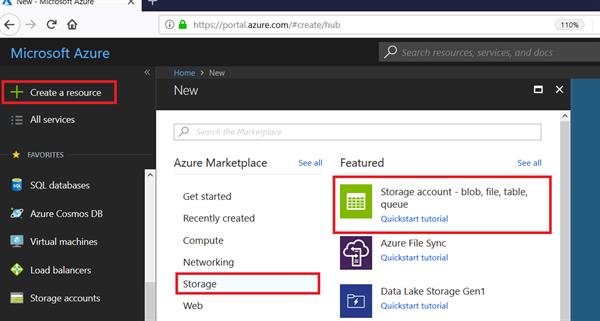
After clicking on the ―Storage account – blob, file, table, queue, you will see the following window.
- Click on the ―Red mark. After clicking, you will see the right portion of the window.
In the Storage option, you need to give your storage account name; here I am giving the storage name ―storageaccount320, you can give the storage name as your wish.
- Finally, click on the ―Create
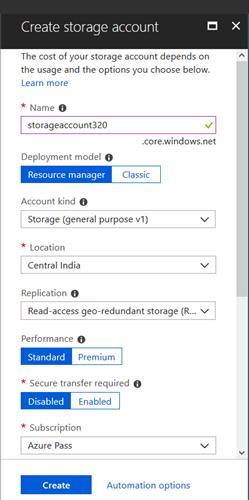
- After clicking the ―Create button, you will get the storage account of your name.
- Go to the ―Storage and then ―storageaccount320, which is my storage account name and then go to the ―ACCESS KEYS, for the Storage Account Name and Primary Access Key.
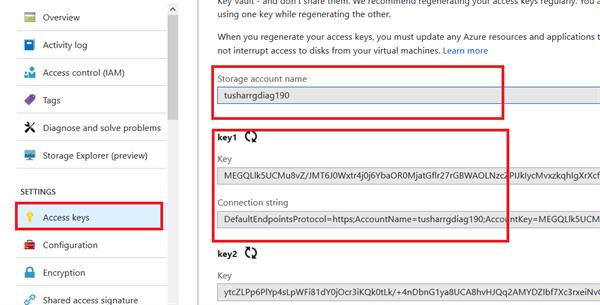
Now you will need to copy the Storage Account Name and Key1 as marked in the above screenshot.
- Copy the storage account name and access key, and paste over the following screenshot. After that, click on the ―Connect
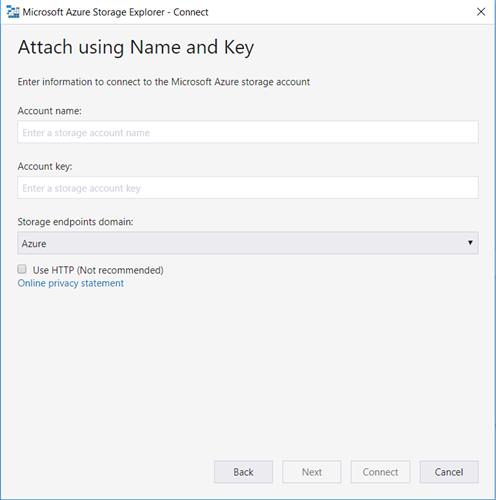
- Again click on Connect button to proceed.
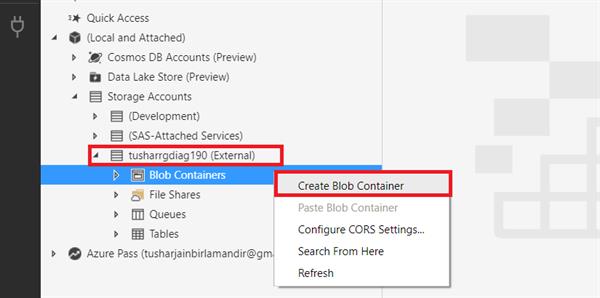
Finally, we have created our storage account with Azure Explorer. You can see in the red rectangle that is ―tusharrgdiag190.
Now we have to create blob storage for accessing services in Azure Storage, so right click on storage account and click on ―Create Blob Container.
Now in the name section, give the name to blob container as you wish {but you can’t use uppercase letters while creating blob storage}.
Here I have given ―mysample name to my blob container.
Now, if you are an owner of your account, choose the ―Set Public Access Level option from the dropdown list.
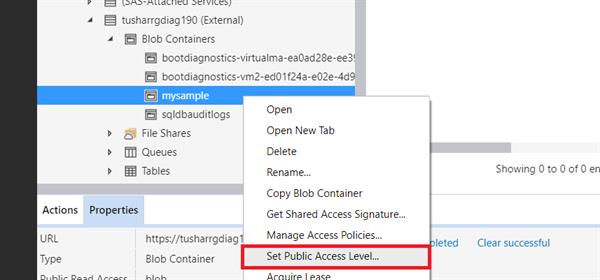
- Select the Public read access for blobs only.

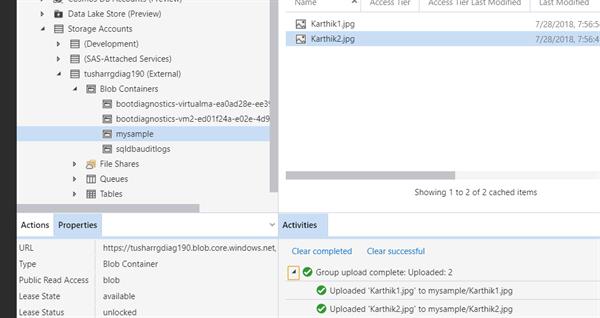
So, we have successfully created our ―mysample named blob storage.
Now, I am going to store images in my Azure explorer. You can directly paste the image or any file inside the ―mysample blob. Here, I am going to paste two images: ―Karthik1 and ―Karthik2 as in the following figure:
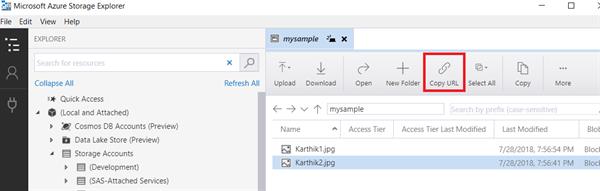
- Click on Copy URL and paste in the browser.
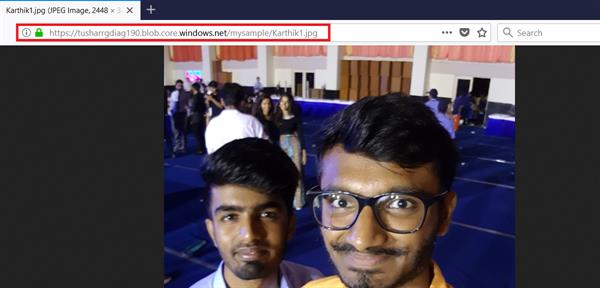
So, finally, we will get our image.

THANK YOU FOR READING THIS ARTICLE
