


How to work with json in UWP C#
Pre-requisite Knowledge
Before we start with the understanding of how to work with JSON in UWP cSharp, we should know-
Introduction of how to work with JSON in UWP cSharp
Welcome back to the article series, on UWP, in this article, we’ll continue the last post of parsing the data received from the Weather API
You can find the previous codebase here (Navigate to the apiDemoUWP folder for the Code). We’ll continue with the previous code only, so make sure you have gone through the previous post as well.
Let’s hop on how we’re going to implement parsing of the incoming JSON data. Well, we can simply use a library called, “Newtonsoft.json”, wait a minute, how to install it? No worries, Visual Studio got it covered with a Package Manager named “Nuget”. By this, we can install various libraries to our application and hence add functionalities on the go.

Now let’s go see the code:
-
Let’s get started with the creation of this Application.
-
Same old steps, Open Visual Studio (I’ll use VS 2019, Community Edition for this demo- It’s free)

- After opening Visual Studio, click on Create a New Project

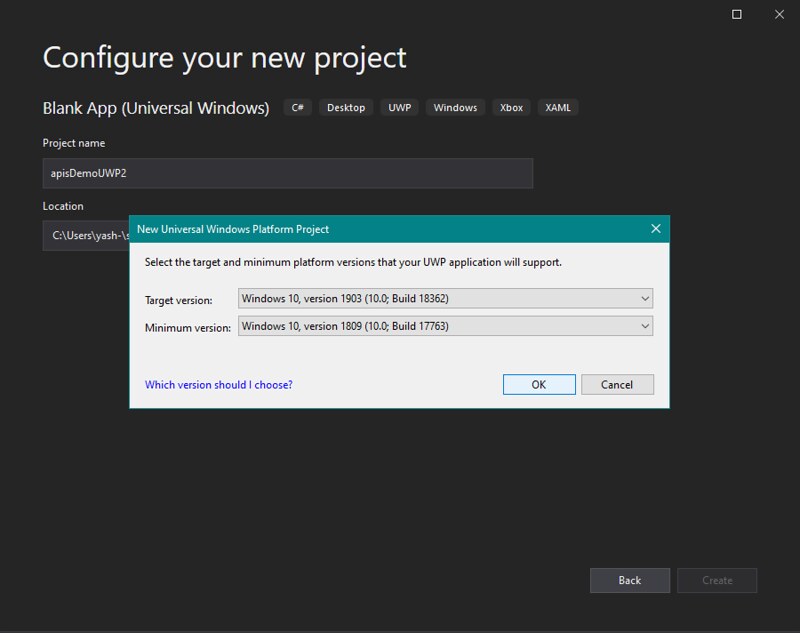
- On the next screen, Search for “UWP” in the top given search bar and then select “Blank App (Universal Windows)”, then simply click on Next

- Give your project a name, then click on Next

- Here we can select the versions accordingly, but for this demo, I’m keeping it untouched.
- After the solution has been created, right-click on the project and then select “Add package”

- Now search for Newtonsoft.json and then select it from search result, then finally click on install button on the right.

- The package can be seen inside the references folder from the solution explorer at the right side.

- Now replace the frontend code by the below code for a slightly different frontEnd (MainPage.xaml)
<StackPanel HorizontalAlignment="Center" VerticalAlignment="Center"> <TextBox IsEnabled="False" Text="Check latitude and longitude" /> <TextBox x:Name="cityName" Text="Delhi" /> <Grid> <Grid.RowDefinitions> <RowDefinition Height="Auto" /> <RowDefinition Height="Auto" /> <RowDefinition Height="Auto" /> </Grid.RowDefinitions> <Grid.ColumnDefinitions> <ColumnDefinition Width="Auto" /> <ColumnDefinition Width="*" /> </Grid.ColumnDefinitions> <Button Content="GetCoordinates" HorizontalAlignment="Center" Click="Button_Click" Grid.Column="0" Grid.Row="0"/> <Button Content="jsonConvert" HorizontalAlignment="Center" Click="jsonConvert_Click" Grid.Column="1" Grid.Row="0"/> <TextBox x:Name="coordinatesTxtBox" Text="Coordinates Here" TextWrapping="Wrap" HorizontalAlignment="Center" Height="200" Width="300" Grid.Column="0" Grid.Row="1"/> <TextBox x:Name="jsonTxtBox" Text="Coordinates Here" TextWrapping="Wrap" HorizontalAlignment="Center" Height="200" Width="300" Grid.Column="1" Grid.Row="1"/> </Grid> </StackPanel>
- Now let’s add a class file for storing the incoming data to be parsed from JSON format. Right-click on the project and then select Add, then select Class.

- In the dialogbox, simply type in the name “weather”, this will create a class file.

- Place the below code inside the weather.cs class
public class Weather { public string title = "New Delhi"; public string location_type = "City"; public string woeid = "28743736"; public string latt_long = "28.643999,77.091003"; }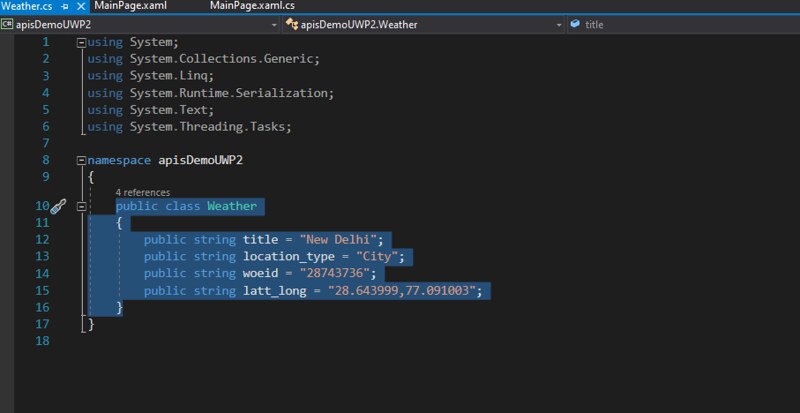
- Navigate to the Backend code now, Add the below 2 using statements:
using System;
using Newtonsoft.Json;
and add this below code as well, right after the old Coordinates Button event.
private void jsonConvert_Click(object sender, RoutedEventArgs e)
{
    try
    {
        Weather person = new Weather();

        string json = JsonConvert.SerializeObject(person, Formatting.Indented);
        jsonTxtBox.Text += "\n" + json + "--END";

        Weather person2 = JsonConvert.DeserializeObject<Weather>(json);
        jsonTxtBox.Text += "\n" + person2.title +
                                    person2.location_type+
                                    person2.woeid +
                                    person2.latt_long +
                                    "-------END";
    }
    catch (Exception exObj)
    {
        jsonTxtBox.Text += "\n" + exObj.Message;
    }
}
Like :

- Now let’s run the application and see what is the Output

- Now we can see that it's clearly very simple to parse JSON data/ serialize objects
Hope you like this article, stay tuned, I have a lot to share in the very near future
Conclusion - In this article, we have learned about:
-
- Using JSON format to parse the incoming data from the weather API
