Ember Js Installation and Set Up | Ember Js Tutorials
This Ember Js tutorial Series and in this post you'll see how to install and set up Ember on your local system.
You can read more about Ember Js in Chapter 1 with the given link below:
Ember Js Introduction
How to Install Ember Js?
You can easily install ember.js in your system. The project creation and management are done by Ember Command-line Interface (CLI). CLI deals with the different kinds of components of management. It also comes up with generators that provide the routers, models, etc.
Following prerequisite dependencies are required to install the Ember CLI:
Git: It is used to track the changes in the file. Ember is using Git to manages and control the dependencies.
You can install Git on your Operating system with the help of the following links.
- For Windows: https://git-scm.com/download/win.
- For Linux: http://git-scm.com/download/linux.
- For Mac OS: https://git-scm.com/download/mac
Node.js and npm package: Node.js is used for developing server-side and networking applications. Node.js is written in JavaScript. It is used to create an application faster and also in a scalable manner. It uses on a JavaScript server. NPM stands for the Node Package manager. It is used for performing various functions on dependencies such as installing, sharing, and managing. Ember CLI uses the run time of Node.js and npm is used to get the dependencies.
Browser: It is a pursuit for governing the sub-components like HTML, CSS, image files, and those which can be installed by using npm.
Watchman: As the name suggests, it is used to keep the eye on the files and directories. In case of any changes, it executes the actions. It is an optional dependency.
Steps to install the Ember CLI
Ember CLI unites the patterns of ember into the development process of application and keeps the eye fruitfully on the productivity of the developer.
Once you have installed the git in your system, run the following commands to install the Ember CLI.
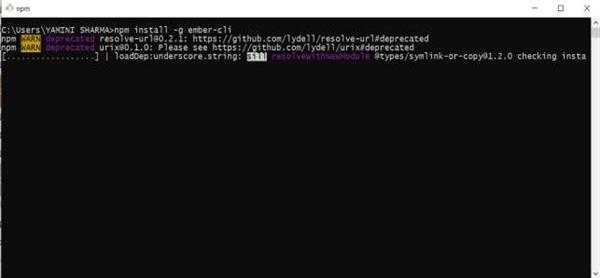
Install the ember by using npm. Type the given command below in the npm.
npm install -g ember-cliThe installation appears the same as you can see in the below image:
Now, you can install the beta version by using the following command.
npm install -g ember-cli@2.10You can check whether ember is installed in your system or not by enter the command given below:
ember -vOnce it is installed, it will appear like this:

How to check whether the ember.js is running on a machine?
Steps for check that your ember.js is working fine on your machine:
- Install an npm
- Test the ember version installed in your
- You can create an application anywhere in your machines such as desktop, c: drive, or etc.
- Type the following command to create an application using Ember CLI:
ember new first-app
This command will create an application and install all the packages with it.
Step 1: Open your application in any of the editors in which you are going to edit the
Step 2: Now, Write the following command into the terminal to run your Ember Server:
$ ember server
like the below image:
Once your server is ready, open any browser and makes a new request on localhost with active port number, I hope your first pages appear like the below one:

I hope everything is working for you. Stay tuned for the next chapter :)


