


Step by step guide of Azure Front Door Service
What is Azure Front Door?
It is a scalable and secure entry point for the fast delivery of global web applications. It works as a performance booster for web applications globally. What else? The following list has some important key points but the list is not exhaustive.
- Primarily used for better performance
- It is an Application Delivery Network (AND) as a service
- Fully managed by Microsoft Azure
- It has load balancing capability for web applications
- For high availability during global failover
- Internally uses anycast protocol
- Offers “always-on” website availability
- Provides Transport Layer Security (TLS) protocol termination (“SSL offload”) meaning every user can set up a TLS connection with AFD instead of establishing the connection over long haul connections with application backend
- AFD supports HTTP and HTTPS both connectivity between its front-door environments and backend
- For configuring AFD, the custom domain is necessary. Azure provides HTTPS for your custom domain as well.
There are many more reasons to use the Azure Front Door service. You may visit Microsoft Azure’s official documentation for more details.
https://docs.microsoft.com/en-in/azure/frontdoor/front-door-overview
The services that Azure Front door provides are:
- Accelerate application performance
- Increase application availability with smart health probes
- URL-based routing
- Multi-site hosting
- URL redirection
- Session affinity
- SSL termination
- Custom Domain & certificate management
- Security via custom WAF rules
- DDoS protection
- URL rewrite
- IPv6 and HTTP/2 support
Now let’s do some practical on AFD
How to create Azure Front-Door Service?
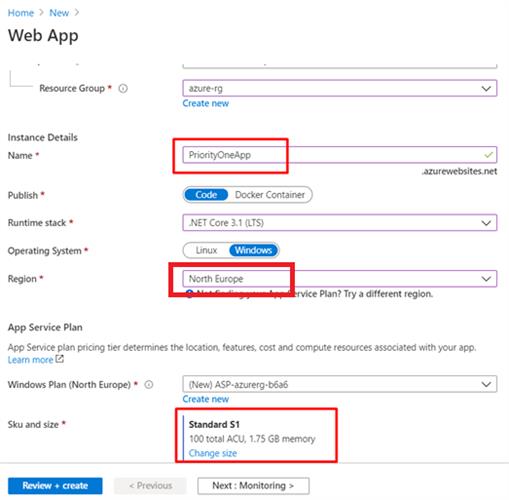
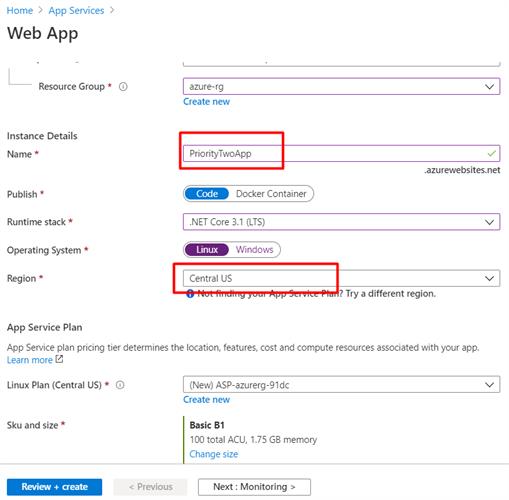
Note: For creating the Front Door Demo, you must have at least 2 instances of your web application. Both applications run in different Azure regions in active mode. For example, I have taken the snapshot of one of my web applications which are provisioned in the North Europe region. The other one has a similar configuration but provisioned in the Central US region.
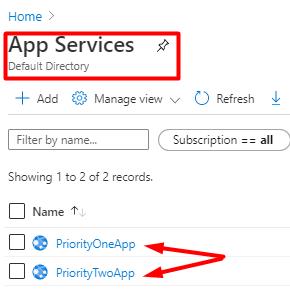
Once both the applications are ready and hosted in their respective regions, go to the App Services option and check them.
The pre-requisites are now ready. Now move on to create Azure Front Door service.
Select the Front Doors in the services search bar or if in the left side panel or go to Network >> Front Door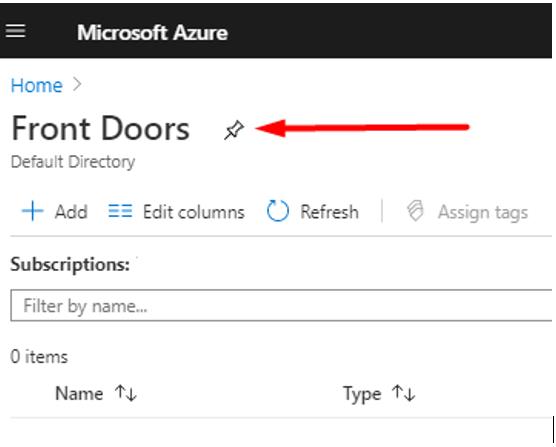
Click on [+ Add] button and you will see the Create a Front Door blade and assign the values to the required fields as given in below snapshot.
There are various tabs in this blade-like Basic, Configuration, Tags, Review + Create. Here Basic tab asks for Subscription, Resource Group, etc.
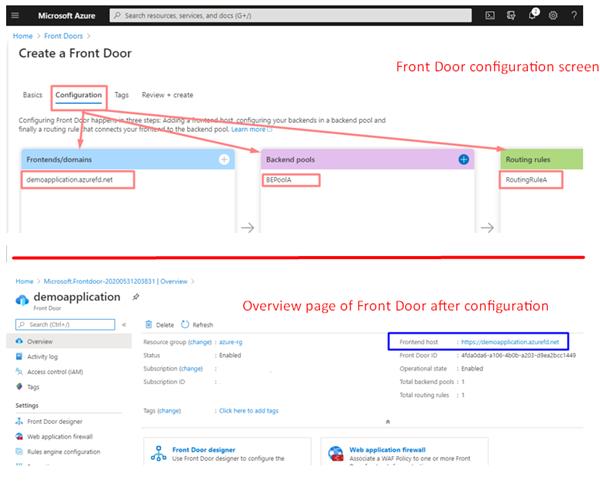
The Configuration tab is very-very important because this tab has all 3 sub configuration tabs for completing the Front Door process.
The sub-tabs are Frontends/domains, Backend pools, and Routing rules. We’ll see how to configure all of these sequentially in the below images.
Step 1: Answer the Basic tab questions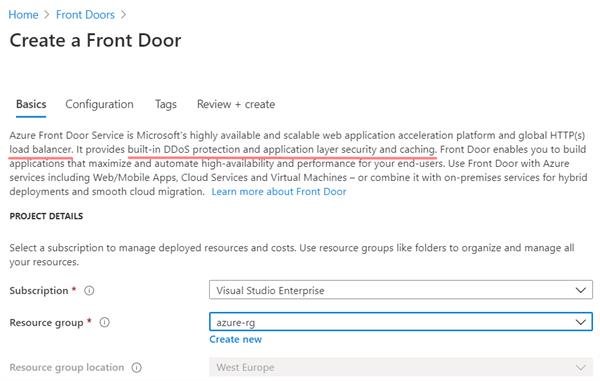
Step 2: Follow Frontend/domains tab instructions
Click on the highlighted button in the image. This will open another blade where you have to assign the desired values against the parameters.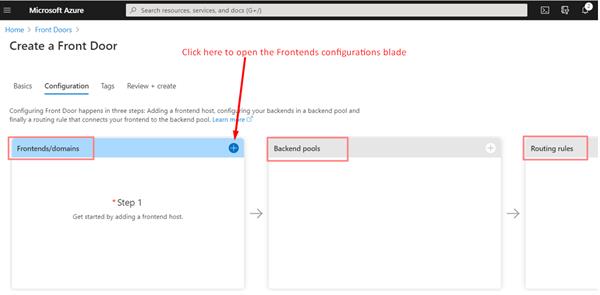
I gave a custom hostname as "demoapplication" and the fully qualified name of my front end will be demoapplication.azurefd.net. It means this URL will be used to access my websites which are sometimes going to be assigned to Front Door service. The original domain names of my applications will not be made public. All traffic to my websites will be routed through Frontdoor URL.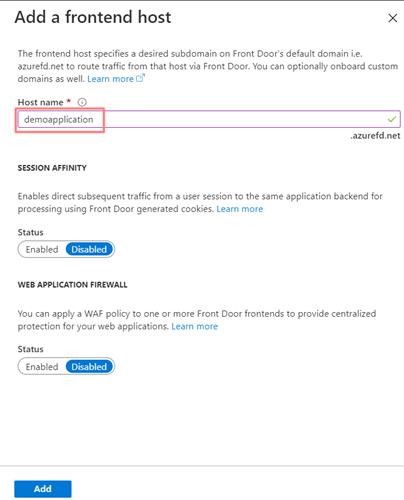
Step 3: Configuration of Backend. Click in the + button on the Backend tab to open the backend configuration blade and assign the values to the parameters.
- Give a name to backend pool
- Add backends
Initially, the backends list (highlighted in the below image) will be blank because we have to add the web application in the pool. Therefore, click on [+ Add a backend] link.
Other properties are left with default values for this demo like health probe setting, path, protocol, etc.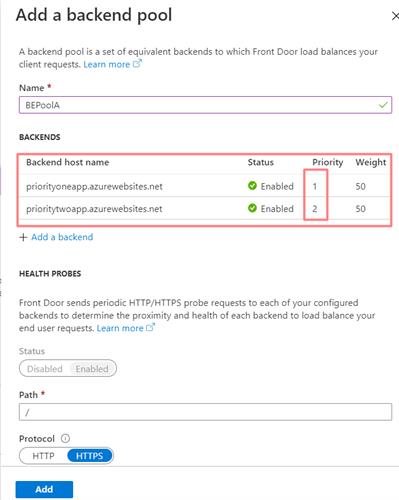
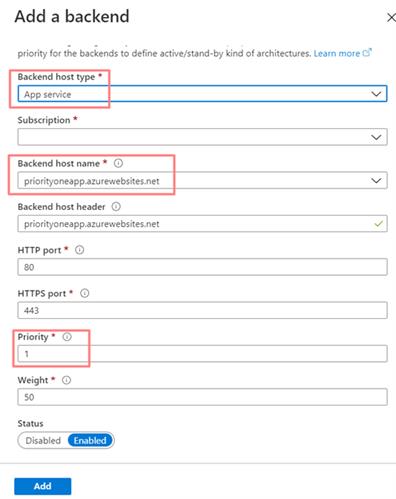
After clicking on the [+ Add a backend], we will get the new blade where we have to set the following properties
- The backend host type should be App Service because we are going to use web applications that we have created.
- Give your subscription id
- Backend hostname – select the main/primary website URL out of others given in the dropdown
- Priority – I have set as 1 because I want me whenever I receive the request, it should go to my priority one web application.
- Other properties are left with default values for this demo
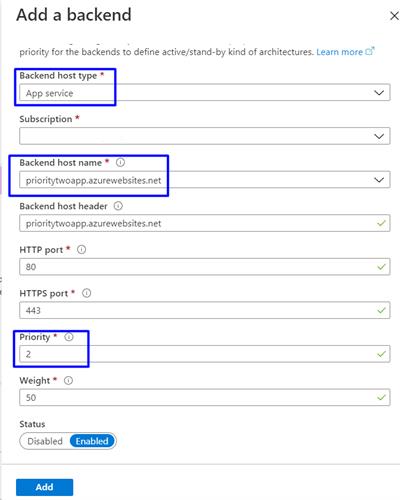
Please note I had to add two backends because there are two applications and both are active. I repeat the above step with different values for hostname and priority. The secondary application would have the least priority.
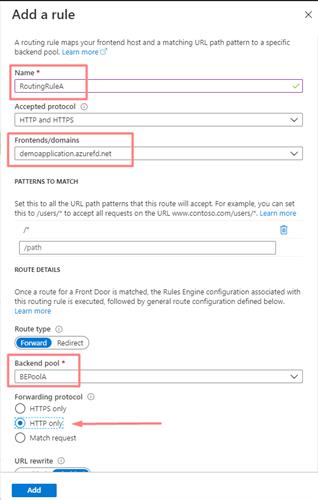
Once the above configuration is completed, we need to set the routing rule. Follow the settings given in the below snapshot.
- Give a name to a routing rule
- Select a frontends/domain name
- Select the backend name
- Other properties are left with default values for this demo
After completion of all the 3 tabs setting, the interface looks like the below images.
Now it is time to get the final output of the newly created Azure Front Door application. There is a catch, the front door application takes about a minute or two after successful deployment to be ready for use.
How to test the behavior of the Front Door service?
- Open the https://demoapplication.azurefd.net
- The application hosted on Priority 1 region (North Europe in this demo) will be rendered/loaded
- In case there are any issues with the site/ network or any other glitch, the Azure Front Door will route the traffic to Priority 2 region (Central US in this demo) and the end-user will see no latency and no difference in execution.
Many thanks for reading and following the article
