


Learn How To Backup SQL Server In Azure
How To Backup SQL Server In Azure
Introduction
Azure Backup is the trending way to take backup within the Cloud, and it's a zero infrastructure panacea that permits us to deploy any backup infrastructure.
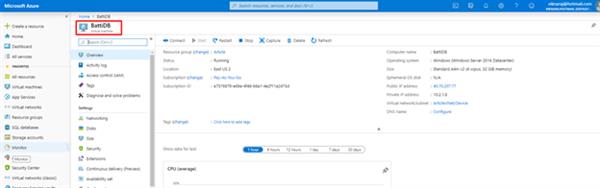
Step 1- Confirming our database Server named BattiDB is running
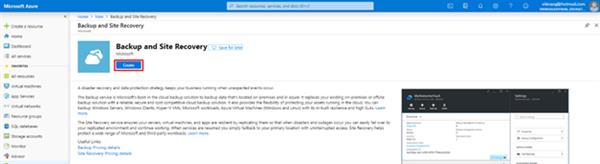
Step 2 - Installing Backup and Site Recovery
Go to the “+ produce a Resource” and search Backup and site Recovery and so click “Create”.
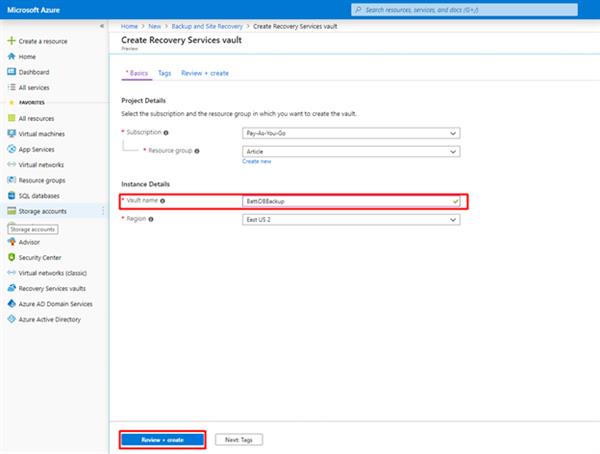
Step 3 - Making the Recovery Service Vault
Choose the Subscription, Resource Group, and then enter the vault name “BattiDBbackup” and then hit the “Review + Create” button on the “Create Recovery Service Vault”.
Step 4 - Creating a Backup
After you've got successfully deployed, go to the backup named “BattiDBBackup” and click on “+ Backup”.

Step 5 - Choosing the Workloads and Backup Details
In the Backup Goal, choose the workload location as ”Azure”, and so select "What do you want to backup" as “SQL Server in Azure VM”, and so click “Start Discovery”.
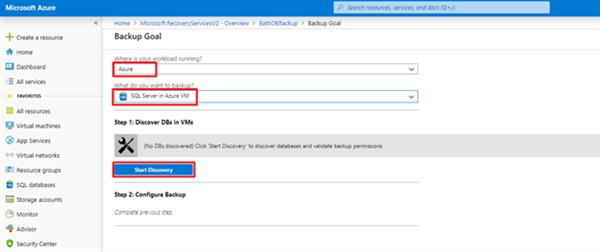
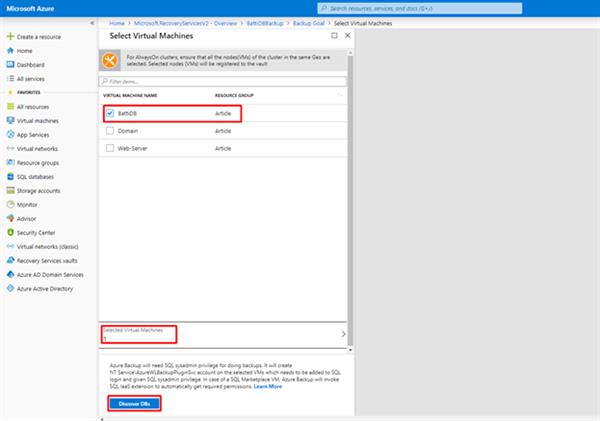
Step 6 - Discovering the database VMs
The virtual Machine’s name will be displayed, when the “Start Discovery” button is clicked. Then select the already named Database virtual machine – ‘BattiDB’. Finally, click on the “Discover DBs” button.
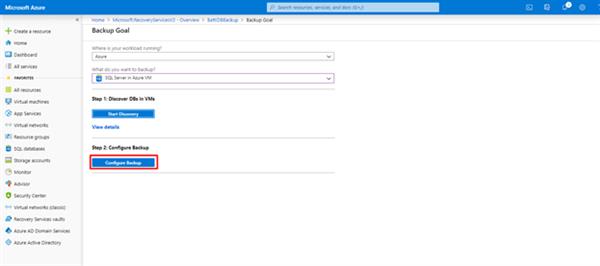
Step 7 - Configuring the Backup
After Discovering the VMs, Click “Configure Backup”.
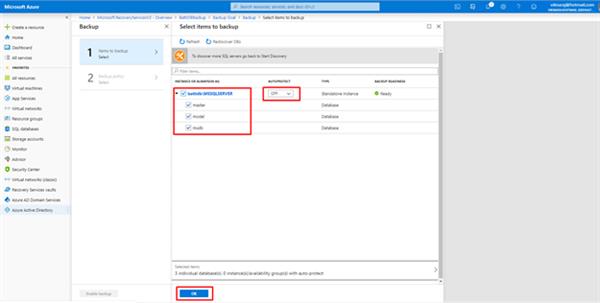
Step 8 - Choosing the database
In the items to Backup, we are able to choose a single database or we can totally select the database that we wish, after choosing the database select “On” under the ‘AUTOPROTECT’ and so click “Ok”.
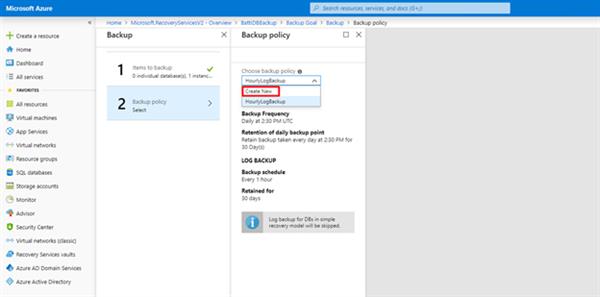
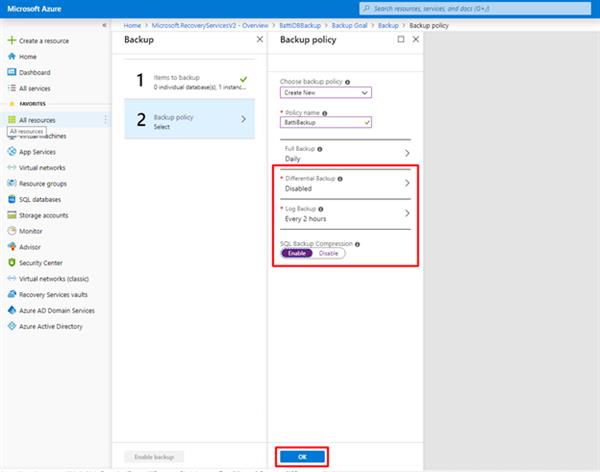
Step 9 - Creating the Backup Policy
We have to create a new policy by clicking the button ‘Create New’ under the ‘Choose Backup Policy’ section.
Step 10 - Assigning the Backup Policy
In the new policy Enter the Policy name and set the complete backup policy and so click “Ok”
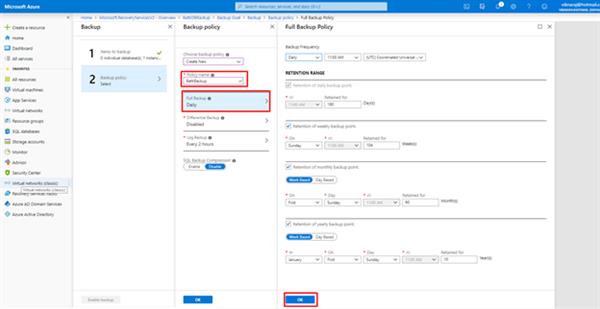
Step 11 - Finalizing the Backup Policy
After setting the Policy we are able to choose the Log backup and SQL Backup Compression, and so click “Ok”.
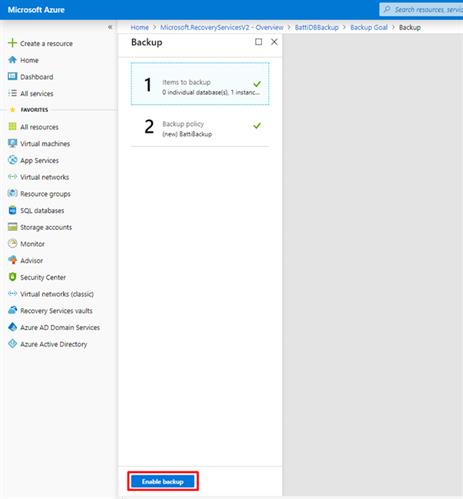
Step 12 - Enabling the Backup
After finishing the settings click “Enable Backup”.
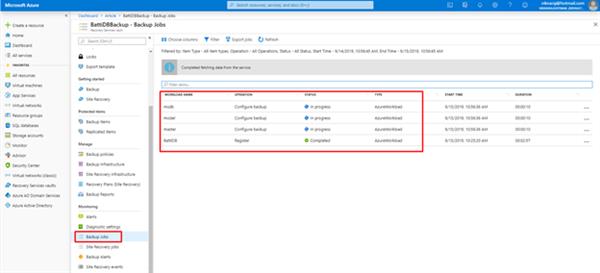
Step 13 - Verifying the Backup Jobs
After enabling the Backup job, we need to examine if the Backup is running, thus Click “Backup Jobs” and verify if there are any errors.
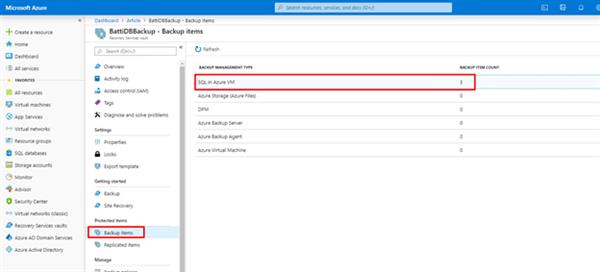
Step 14 - Confirming the Backup items
After successfully completed the Backup Jobs, we are able to verify our Backup things. If we wish to recover the Backup we are able to choose the Backup Item and recover it from the “Backup items”.
Summary
In this article, we've learned a way to back up a database using Backup Services. If you've got any issue or want any clarifications, feel free to comment below the comment box.
