


How to send emails in C# windows form application
How to send emails in C# windows form application
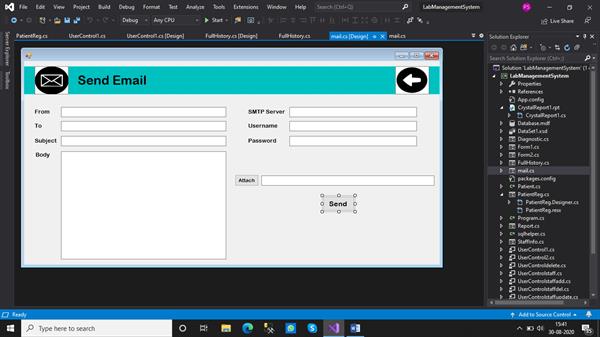
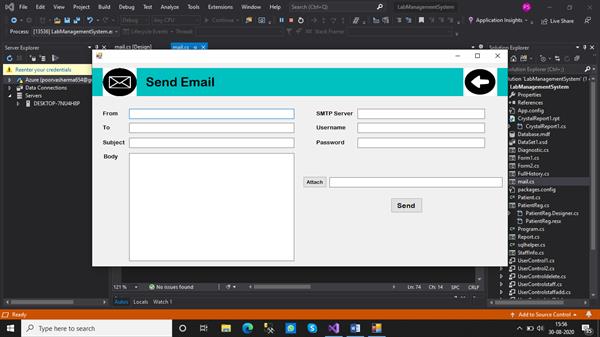
STEP 1: We open up a windows form application and drag and drop controls from the toolbox as shown below. We include text boxes for the From, To, Subject, Body, SMTP server, Username, and Password. We even include an ‘attach’ button which enables us to attach the files from the system. A ‘send’ button is also included on the form clicking on which the mail is sent.
STEP 2: We import ‘System. Web’ in our code, in order to enable browser-server communication. Also, we include ‘System.Net.Mail’ namespace which is used to send electronic mail to a Simple Mail Transfer Protocol (SMTP) server for delivery.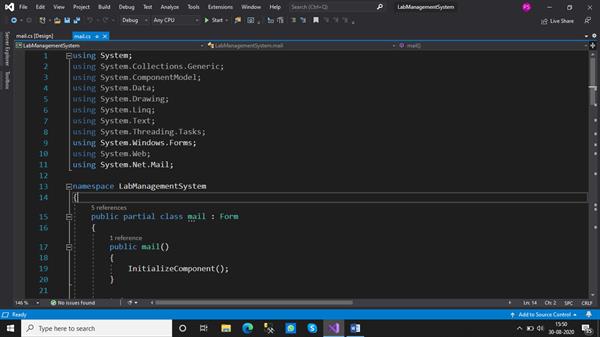
STEP 3: We create an instance of ‘MailMessage’ and ‘SmtpClient’ class that enables us to send the mail. Instances of ‘MailMessage’ class is used to construct email messages that are transmitted to the SMTP server for delivery using the ‘SmtpClient’ class. Using the ‘Attachments’ property we can even link an attachment with our email. Port 587 is the preferred port for mail submission, so we assign the value 587 to the port. We use the ‘Credentials’ property to authenticate the user by sending the mail. We set the ‘EnableSsl’ property to true to specify whether the Smtp client uses the Secure Sockets Layer (SSL) to authenticate the connection or not. Gmail Settings require us to set SSL to true so, we enable the SSL for the SmtpClient. We created a clear() method to automatically clear the textboxes as soon as the mail is sent.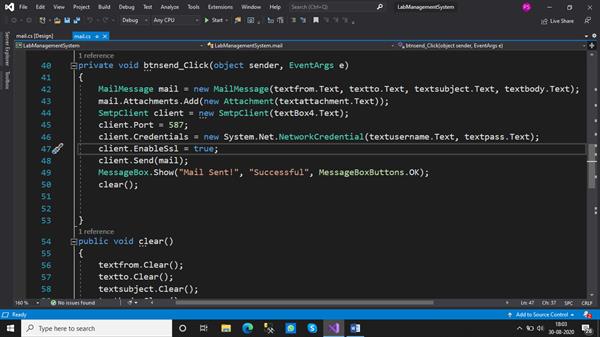
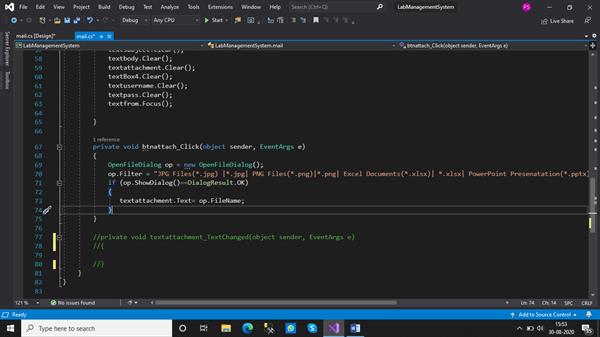
STEP 4: To add functionality to the ‘Attach’ button, we introduce an instance of the ‘OpenFileDialog’ in order to open a dialog box as the button is clicked. The button enables the user to choose the file to attach with the mail. As soon as, ‘Ok’ is clicked the path of the file appears in the textbox.
OUTPUT:
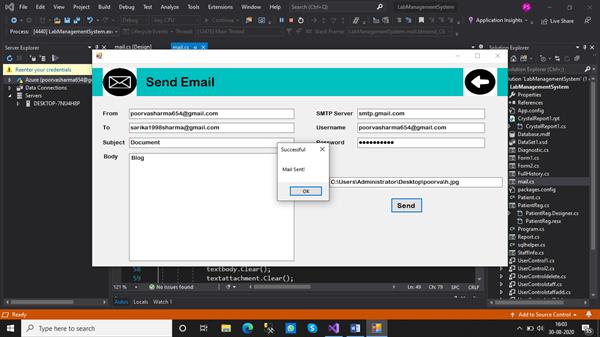
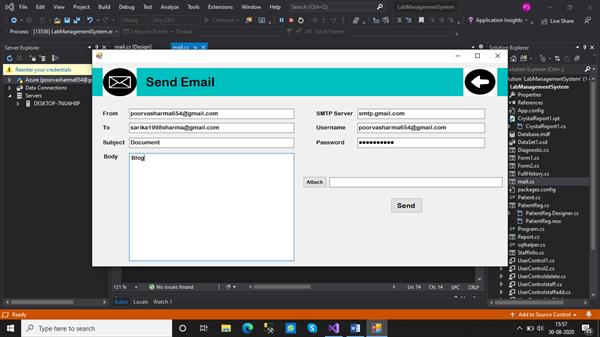
We provide the email ids in the ‘From’, ‘To’ textboxes. The SMTP Server takes the smtp.domainName.com as input. In this case, the domain name is Gmail, so we provide ‘smtp.gmail.com’ as input.
Clicking on the ‘Attach’ button, a dialog box appears which asks the user to choose a file.
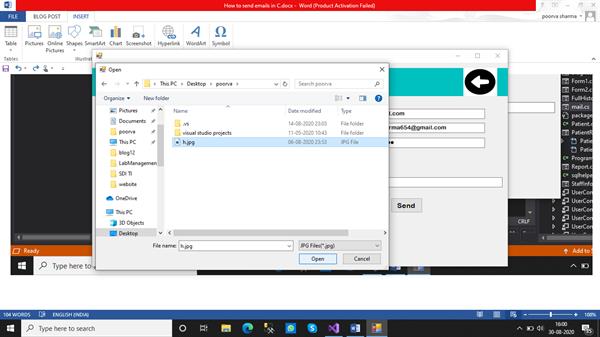
Choosing a file, the textbox is populated with the path of the file.

We click on the ‘Send’ button to send the mail. Finally, a message box appears stating that the mail is sent.