


How to create a Web Site on Microsoft Visual Studio and publish it on Azure?
In This Article, we'll create an Asp.Net Web Site and will host it Azure Web App Services using Azure SDK in Visual Studio, So you just need to follow the Following Steps along with me and I hope you'll be able to do the same. First, you need to understand what is azure and it services if you new to Microsoft Azure, so follow this Article:
You are welcome to skip it if you are known to Microsoft Azure and can start from Step 1 after opening Visual Studio.
Step 1: Open Visual Studio and create a new website.

Step 2: Add a new Web Form by right-clicking on the website in Solution Explorer and then selecting Add > Web Form.

Step 3: Add a Label, a Textbox and Button to create a GUI like shown below.
Step 4: Coding GUI events and Script as shown below.

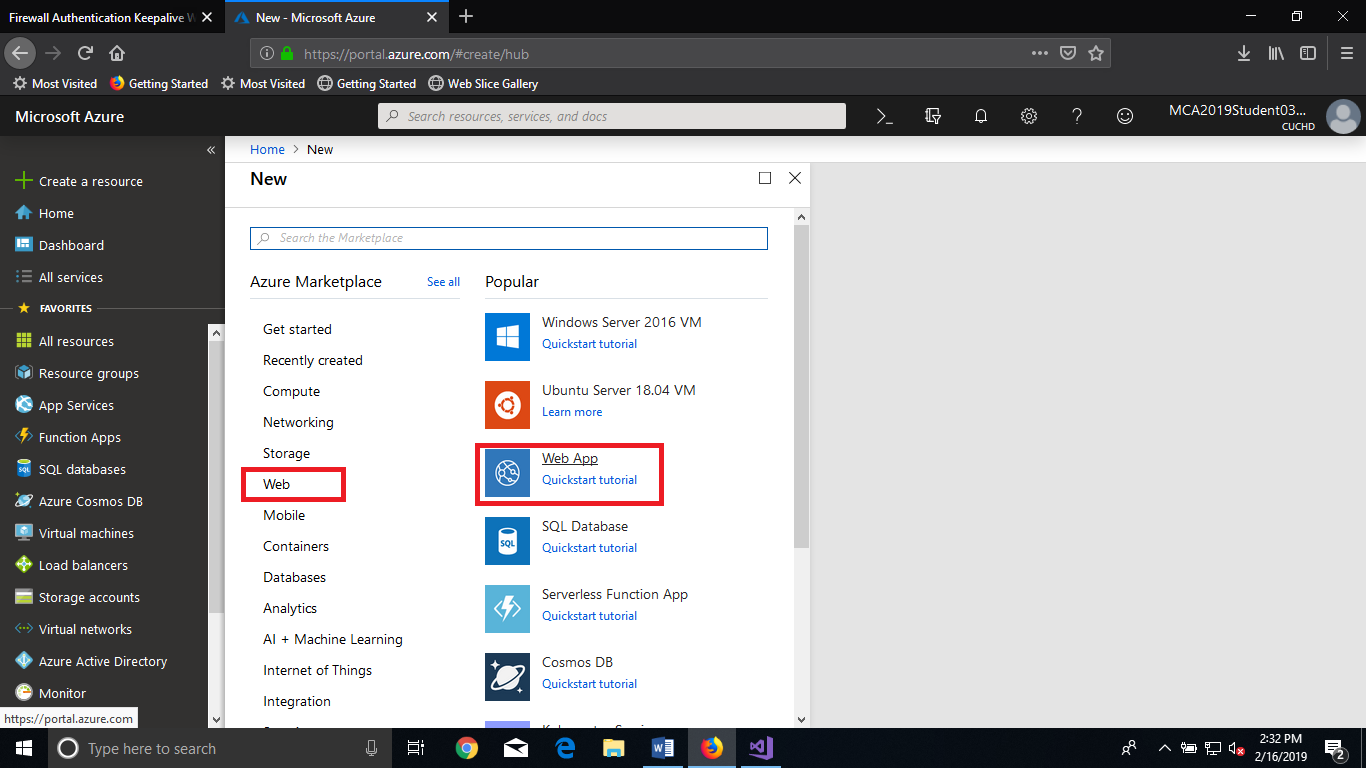
Step 5: Now, open the Azure portal and click on the New blade > Web > Web App.
Step 6: Enter a unique name for your Web App and check Pin to Dashboard if you want to pin your application to the dashboard and click on Create button and wait for the deployment.

Step 7: Download the publish profile of your Web App.

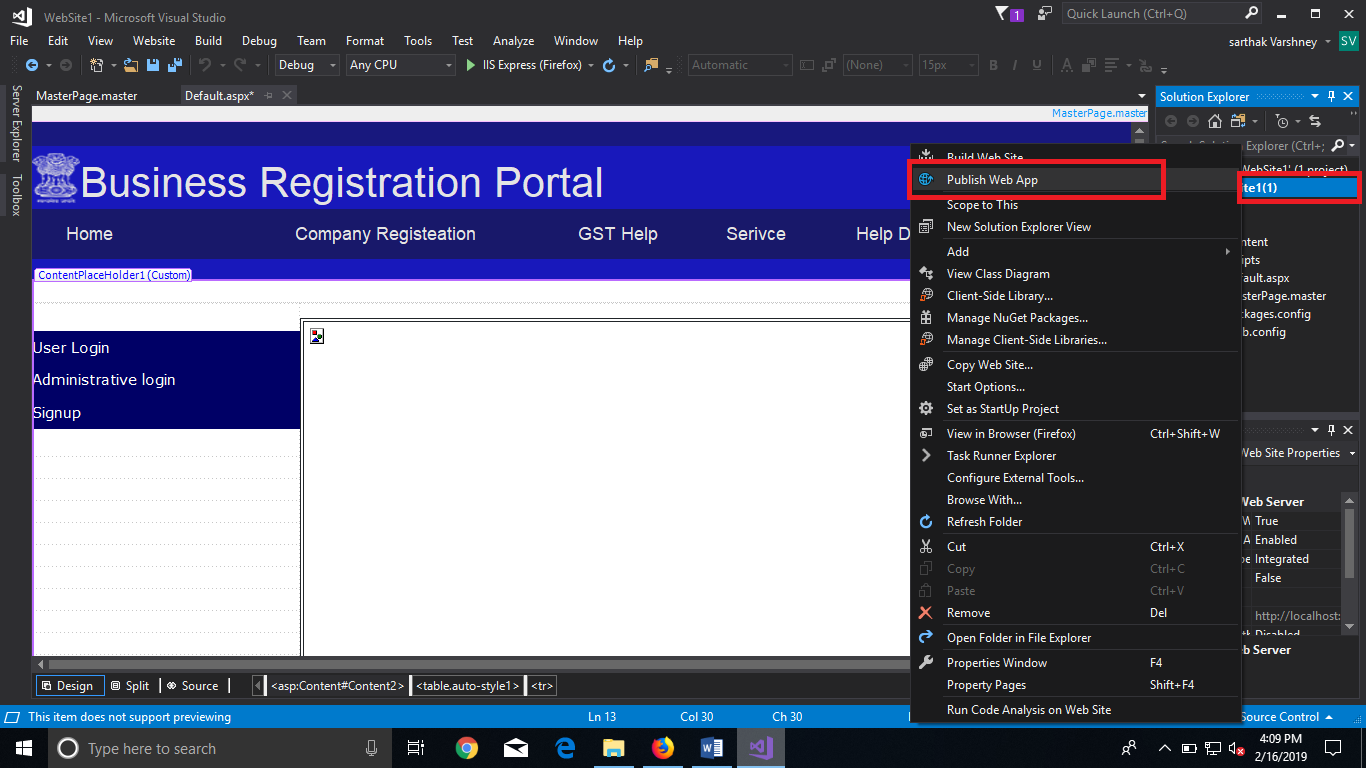
Step 8: Now, open Visual Studio and Publish the Website by Right-clicking the Website name in solution explorer and then click Publish Web App.
Step 9: Select the Import option to Import and Click on Publish Option.

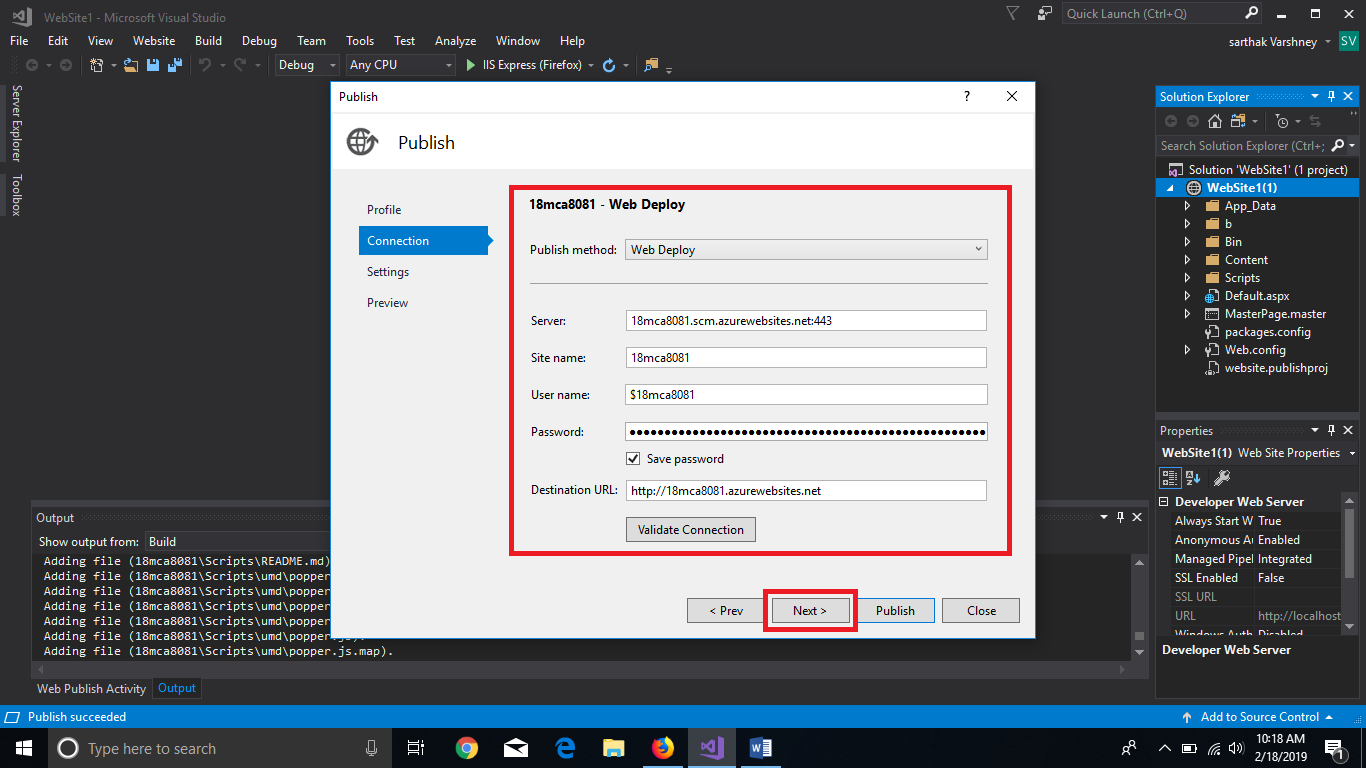
Step 10: Select the publish profile downloaded from Azure and Click OK.

Step 11: Visual Studio will load information about the FTP server. Now Click on Publish to start publishing your website, once publishing is complete Visual Studio will open your website.
Output: