


Git Interview Questions & Answers with hands-on exercises | Part 2
In my previous article (Part 1), I explained the basics of git. I wish to let you know about the following topic with expected interview questions out of it.
Link to Part 1: Check Part 1 here
Part 2 topics:
- Configure global git settings for your system
- Create a new dot net project and initiate git for this project
- Git commit the code and changes to master branch locally
Let’s get started…
I have created a new dot net core project using Visual Studio 2019. I have taken a default template and enabled the version control using git. I’ll let you know how I have done this step by step.
How to configure git so that it can be used anywhere in your system?
There is a set of two git commands which once executed, would allow the user to use git operations from any working directory. This activity is also known as the global configuration.
By using these commands, you are declaring your identity to git. It is the first activity after installing the git. It is very important because every Git commit uses this information.
PS D:\ArticleDemo\FirstWebApp> git config --global user.name “your name”

PS D:\ArticleDemo\FirstWebApp> git config --global user.email “your email id”
Please don’t get confused with the word “global” here. The “global” boundary will remain in your system.
Do we need to configure global settings every time we use git?
No, it is a one-time configuration that has to be set at the time of git install. Though you can change this configuration anytime if there is any change required but all future git commits will follow the new configuration.
How can we check the global configurations if we are not aware of it?
Git maintains various configurations other than your identity information which can be anytime seen using the git config --list command.
An example is given below:
Notice, my identity information is given at the end of many under the hood configurations.
PS D:\ArticleDemo\FirstWebApp> git config --list

diff.astextplain.textconv=astextplain

filter.lfs.clean=git-lfs clean -- %f

filter.lfs.smudge=git-lfs smudge -- %f

filter.lfs.process=git-lfs filter-process

filter.lfs.required=true

http.sslbackend=openssl

http.sslcainfo=C:/Program Files/Git/mingw64/ssl/certs/ca-bundle.crt

core.autocrlf=true

core.fscache=true

core.symlinks=false

credential.helper=manager

user.name=Abhishek Maitrey

user.email=sonofspm@hotmail.com
Now it is the time to do some hands-on git commands. Get ready
Step 1: Create a new project. I have created a DotNet core web application project.
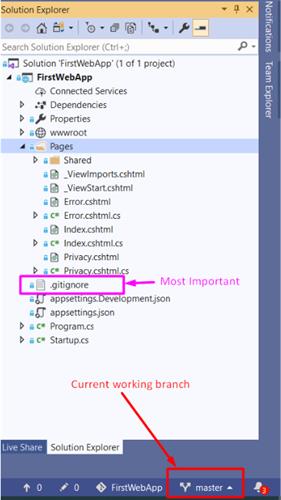
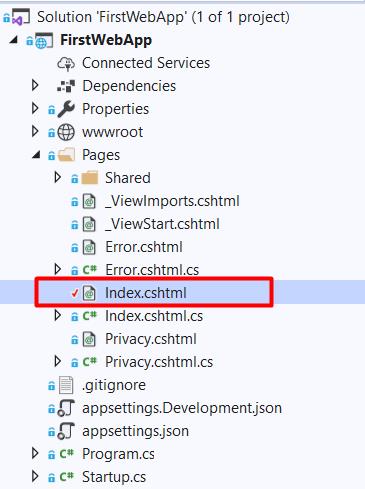
Image 1: Project in Visual Studio 2019
If you notice in the below snapshot, you will find
- There is a .gitignore file. It is most important to have this file in the code and its repository. It is a favorite topic of interviewers. I’ll discuss this also in the same article.
- The current git branch is “master”
- There would a tiny lock icon prefixed with each file. It denotes that your project is version controlled. This time it does not matter whether it is controlled locally or remotely. We’ll focus on the local repository or remote repository in section 2.1 in this article.
- Below is the list of files using the command prompt. Important point:
The project once build will generate two folders bin and obj which have executable libraries and internal/external project dependencies. Ideally these folders should not be managed by git and also not to store in the repository.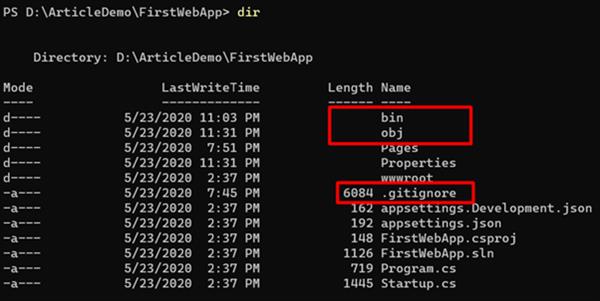
Image 2: List of project files
Command 1:
Create an empty Git repository or reinitialize an existing one
PS D:\ArticleDemo\FirstWebApp> git init

Initialized empty Git repository in D:/ArticleDemo/FirstWebApp/.git/
There will a new hidden folder created (.git) after this command.
Command 2:
PS D:\ArticleDemo\FirstWebApp> git statusShow the working tree status. It shows current working branch as “master” and list of untracked files.
Command 3:
PS D:\ArticleDemo\FirstWebApp> git add .Add file contents to the index. The "git add" command will not add ignored files by default. That’s why I have added the .gitignored file explicitly from other sources.
Here dot (.) refer to all filed in the project otherwise you can add the selected file also by giving the file name or wildcard.
Examples:
git add Documentation/\*.txt

git add git-*.sh
Command 4:
PS D:\ArticleDemo\FirstWebApp> git commit -m "first commit"
Record changes to the repository. The -m is used for message and the text in double-quotes is the custom message you wish to pass to your commit.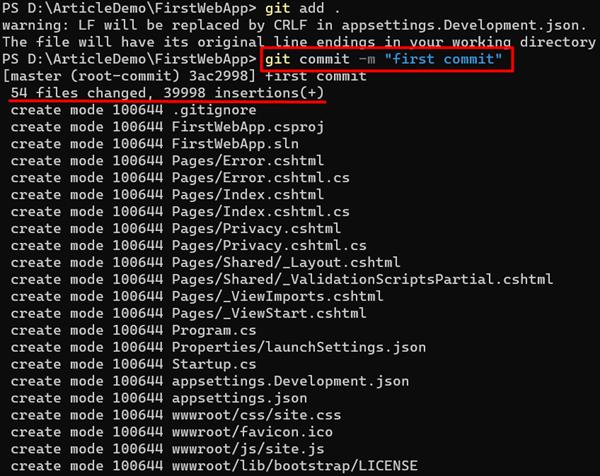
The above commands are the minimum requirement of the management of version control. Currently, version control is restricted to the local system. Congratulations, your code is now in git’s control. You can now start making changes in your code and commit so that git can start maintaining the versions.
PS D:\ArticleDemo\FirstWebApp> git status
On branch master
nothing to commit, working tree clean
I’m now making a change in my code. Let’s see how it would look like.
Current view of my application’s index page
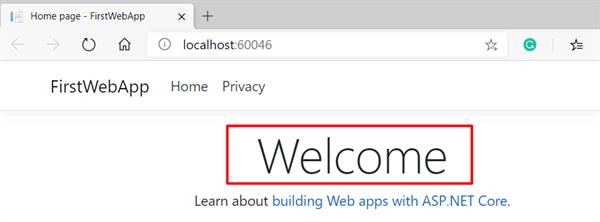
I’m making the change in welcome message from “Welcome” to “Welcome to Git Demo”. The index.cshtml file is checked-out.
Once you are done with the changes, then commit the change and repeat the following commands:
- Git add
- Git commit
- Git status
PS D:\ArticleDemo\FirstWebApp> git add .
PS D:\ArticleDemo\FirstWebApp> git commit -m "changed welcome message"
[master 06450b2] changed welcome message
 1 file changed, 1 insertion(+), 1 deletion(-)
PS D:\ArticleDemo\FirstWebApp> git status
On branch master
nothing to commit, working tree clean
PS D:\ArticleDemo\FirstWebApp> git log

//To check the log of all the previous commits

commit 06450b23c69563f820769582cdc366b405528919 (HEAD -> master)
Author: Abhishek Maitrey <sonofspm@hotmail.com>
Date:   Sun May 24 02:44:28 2020 +0530

changed welcome message

commit 3ac29985ec14d1e73759afe257ca122800a4bd0e
Author: Abhishek Maitrey <sonofspm@hotmail.com>
Date:   Sun May 24 01:49:01 2020 +0530

first commit
PS D:\ArticleDemo\FirstWebApp>
The next step is to create a branch from the master branch and start operations through git.
Stopping this article here and would come back in Part 3 article with followings:
- Connect to Remote Repository (GitHub / Azure DevOps)
- Push local code to Remote Repository
- Changes and push back to Remote using Pull Request
Thanks for reading. Happy learning!
