


Azure Resource Manager Template- Part2
In the last article "Understand the concept of ARM-Part1", we got to understand the basic concept of Azure Template manager. Now we will learn what is ARM Template and how we can create it from Azure Portal and deploy.
What is the ARM Template
Azure Manager Template is a JavaScript Object Notation (JSON) file that defines the infrastructure and configuration for your project. The template uses declarative syntax, which helps you to state what you plan to deploy without writing the programming commands sequence in order to create it.
Why does use ARM Template
Nowadays development teams are working in agile methodology with frequent iterations. They need to deploy their cloud solutions regularly, and the team realizes that their technology is in a stable condition. So teams need a cohesive system to handle infrastructure and application code.
To overcome these problems, Azure introduces Azure Resource Manager Template, using the ARM Template you can automate deployments and use infrastructure use as a code. In JSON file, you just have to define your infrastructure that you need to deploy on Azure. Once you create a solution from the portal, a deployment template is automatically included in the solution. You don't need to create your template from scratch as you can start with your solution template and customize it to suit your specific needs because creating from scratch is a bit difficult.
ARM Template Format
Below is the format of ARM Template where few fields are mandatory and others are optional
{

  "$schema": "https://schema.management.azure.com/schemas/2015-01-01/deploymentTemplate.json#",

  "contentVersion": "",

  "apiProfile": "",

  "parameters": {  },

  "variables": {  },

  "functions": [  ],

  "resources": [  ],

  "outputs": {  }

}
$schema: This is required field which denotes the Location of the JSON schema file that describes the version of the template language.
For resource group deployments, use:
https://schema.management.azure.com/schemas/2015-01-01/deploymentTemplate.json#
For subscription deployments, use:
https://schema.management.azure.com/schemas/2018-05-01/subscriptionDeploymentTemplate.json#
contentVersion: This is required property which can be used for the template version. You can provide the value of it. Use this value to record the template's significant changes. This value can be used when deploying resources using the template to ensure that the right template is used.
apiProfile: This is an optional property. A version of the API which serves as a collection of API versions for resource types. Use this value to avoid having to specify API versions for each resource in the template. When you specify an API profile version and don't specify an API version for the resource type, Resource Manager uses the API version for that resource type that is defined in the profile.
parameters: This is an optional property. Values that are offered when deployment is executed to customize resource deployment.
variables: This is an optional property. Values that are used as JSON fragments in the template to make easy template language expressions.
functions: This is an optional property. This is User-defined functions that are available within the template.
resources: This is a required property. Resource types that are deployed or updated in a resource group or subscription.
outputs: This is an optional property, in these values that are returned after deployment.
Create and deploy an ARM Template from Azure Portal
As above I mentioned creating an ARM template from scratch is not an easy task. So you can create from Azure Portal and configure it by editing.
Let’s start by creating an ARM template that will have the configuration for Azure Storage Account.
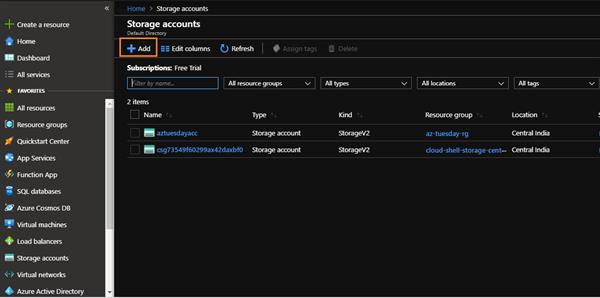
Step1: Sign in to the Azure portal.
Step2: All services=>Storage=>Storage Accounts

Step3: Click on Add button
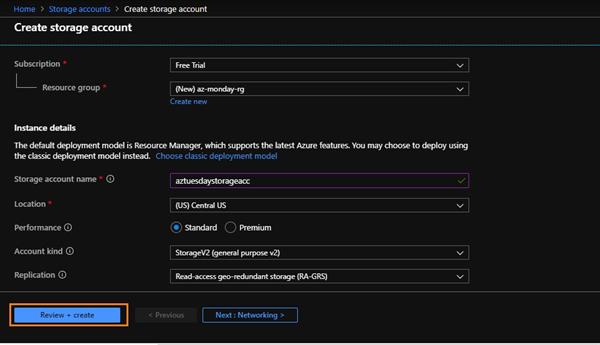
Step4: Click on “Review+create” after filling the required fields.
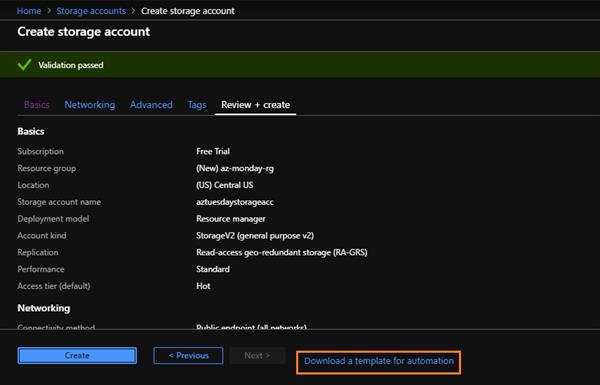
Step5: After passing the validation click on “Download a template for automation”
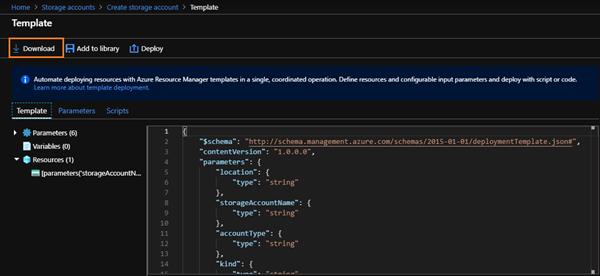
Step6: Click on “Download” button and get the Zip file in your local drive for editing template.
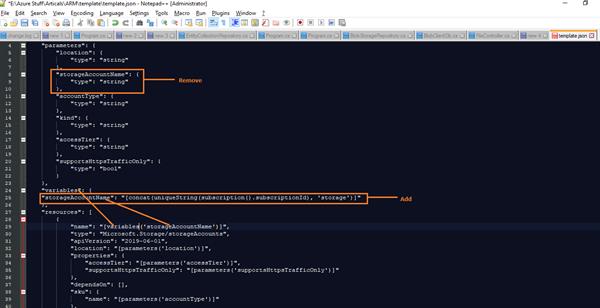
Step7: Unzip the zip file and open template.json file in any editor for editing as we have opened it in Notepad++.
- Remove “storageAccountName” sub-property from parameters property section.
- Add “storageAccountName”: ”[concat(uniqueString(subscription().subscriptionId), ‘storage’)]” sub property inside variables property.
- Make changes in sources array according to variables.
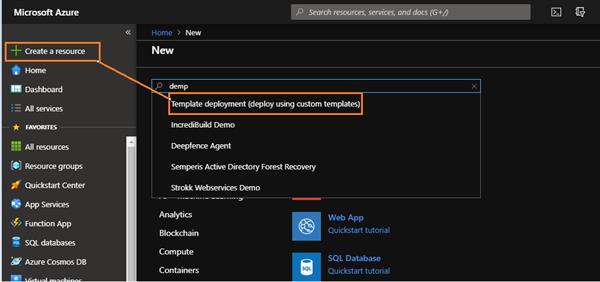
Step8: Create a source=> Template Deployment
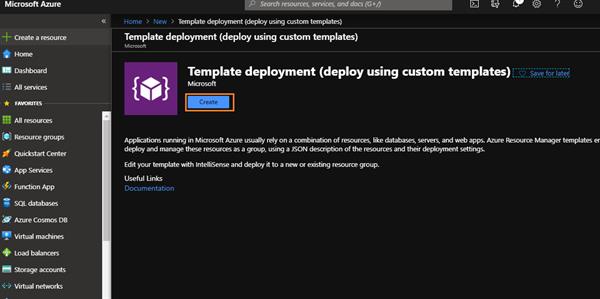
Step9: Click on create button
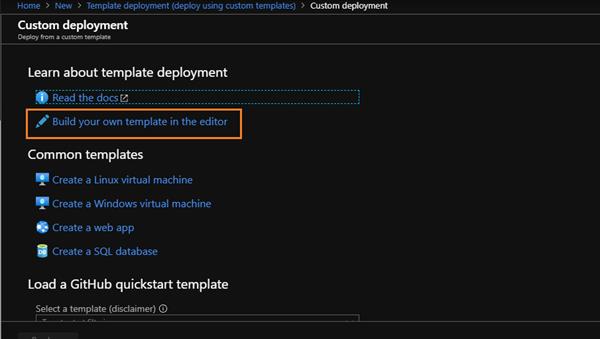
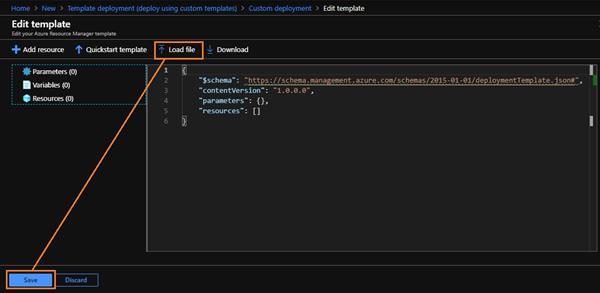
Step10: Click on “Create your own template in the editor”
Step11: Click on “Load file” select and upload your template.json then click on “Save” button.
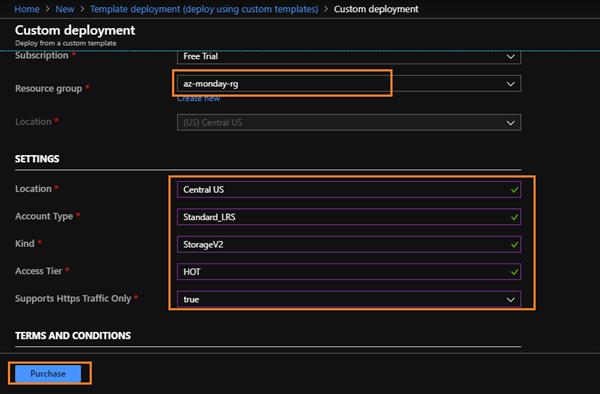
Step12: Select the resource group if you already have otherwise go for the new one, and then fill the settings fields. In last check the “I agree to the terms and conditions stated above” checkbox and click on “Purchase” button.
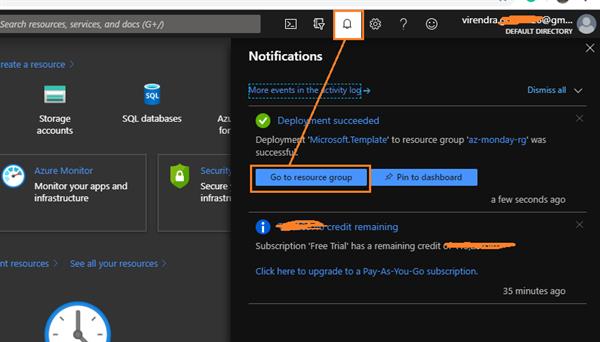
Step13: It will take few seconds to deployment get succeed, then “Go to resource group”.
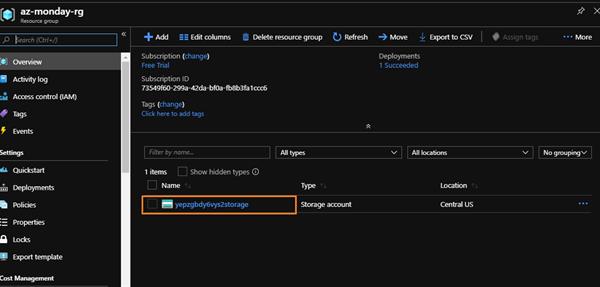
Step14: Under the resource group, you can see your Storage Account.
Thank You, Hope will like this article.
