Installing Arduino IDE
So from now you are familiar with the main parts of Arduino so let’s get started and get our hands dirty.
In this tutorial we will be installing the IDE of Arduino to upload our code to board.
Software Requirement:
- Arduino IDE Software
Hardware requirement:
- Arduino Board
- USB Cable (A plug to B plug)
Steps:
Step 1: Download and install the IDE
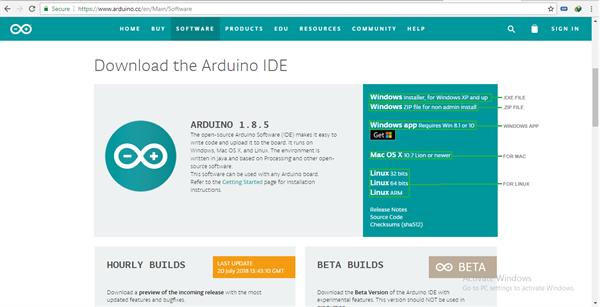
- Go to this Link and download the IDE
- Install the setup on your PC
Step 2: Launch the IDE

- Search for “Arduino” in apps (window 10)
- Click on the Arduino icon
Step 3: Power up your board
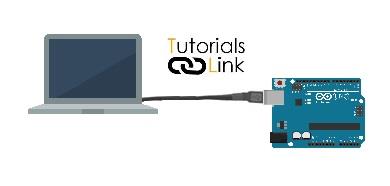
- Connect one side of USB to Arduino board and other side to your computer USB port
Step 4: Open first project
Once you have installed the IDE you have two options:
- Create a new project
- Open an existing project
To create a new project:
- Select: File→new
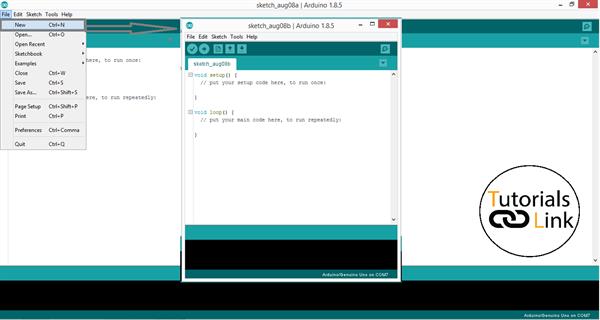
Top open an existing project:
- Select: file→ example→basic→blink
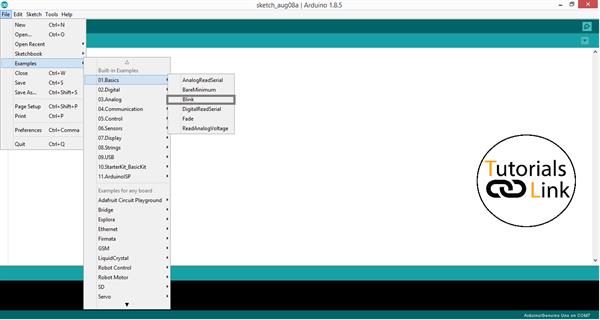
In this case we are selecting one of the examples labeled as “blink”
Which make the default LED (On PIN no 13) blink with a delay of 1 second
Step 5: Select Arduino board
You have to select the board you are using in your IDE as the Arduino IDE support number of boards.
For selecting board:
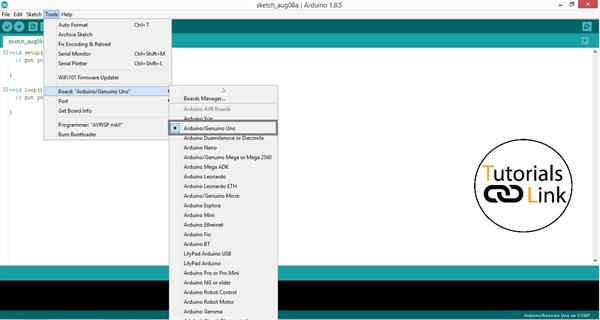
- Go to Tools → Board and select your board.
Step 6: Select PORT
Select the port on which your board is connected
To select PORT:
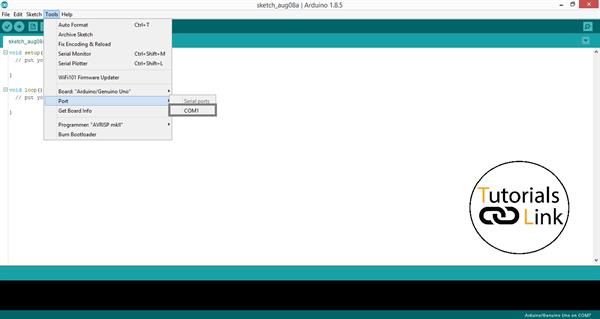
- Tools → Serial Port
Step 7: Compile and Upload the code
- To burn the code to your board you must compile and upload the code to your board
To compile the code:
- Click on the Compile button OR
- Select: Sketch → Compile OR
- Press: CTR+R

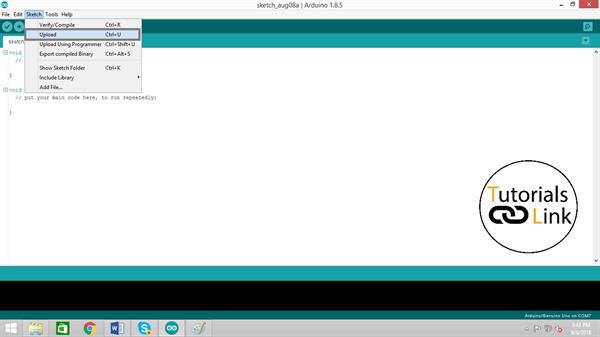
To upload the code:
- Click on the upload button OR
- Select: Sketch → Upload OR
- Press: CTR+U
Conclusion:
Uploading a code mean to transfer the code from one place to other. In the uploading process the code will saved on to the microcontroller's memory for future usage.
You will see “Done uploading” message and the default LED blinking if the code is successfully uploaded to the board.