


Implement Autocomplete textbox using AngularJS from database in Asp.net MVC
Today in this article, I will explain How to Implement Autocomplete textbox using AngularJS in Asp.net MVC with the Stored procedure. In this example, I have used Ado.Net for database operation and Angular2.
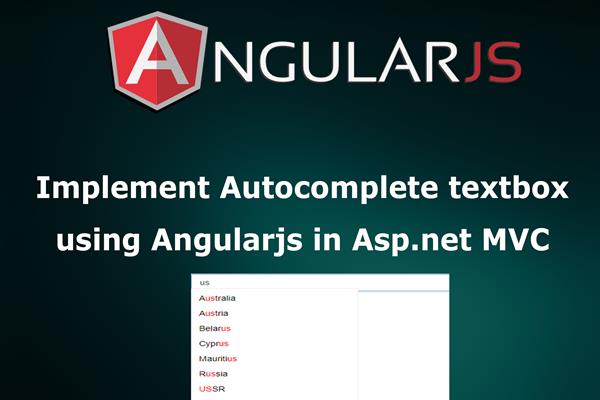
The auto-complete textboxes are mostly used in real time projects to increase user interactivity with the site. Now in this article, we explain to implement autocomplete textbox in AngularJS.
Follow these steps in order to implement “Autocomplete textbox using AngularJS”
Step1: Create New Project.
Go to File > New > Project > Web > Asp.net MVC web project > Enter Application Name > Select your project location > click to add button > It will show new dialog window for select template > here we will select empty project > then click to ok
Step2: Create a table and Stored procedure in the database.
In this example, I have used following table for Server side pagination.
CREATE TABLE [dbo].[tbl_Country] (

    [Country_id] INT            IDENTITY (1, 1) NOT NULL,

    [Country]    NVARCHAR (150) NULL,

    PRIMARY KEY CLUSTERED ([Country_id] ASC)

);
Now create stored procedure for getting the record
Create proc Sp_get_Country

as

begin

Select * from tbl_Country

end
Run above script in MS SQL Server and click to execute button
Step3: Add Connection string in web.config file
Here I have added connection string in ‘web.config’ file under Configuration section as follows
 <connectionStrings>

    <add name="con" connectionString="Data Source=.;Initial Catalog=test;Integrated Security=True" providerName="System.Data.SqlClient"/>

  </connectionStrings>
Step4: Create a controller.
Go to Solutions Explorer > right click on controller folder > Add Controller > Enter Controller name > Select template “empty MVC Controller ” > Add.
Here I have created a controller “HomeController”
Now we will add a view for Index action where we will perform auto-complete text.
Step5: Create model class
Go to Solutions Explorer > right click on Model> Add New class > Enter a class name (Here I rename it as ‘country.cs’).
Write all properties in ‘country.cs’ class as shown below
namespace AngularAutocomplete.Models

{

    public class country

    {

        public int Country_id { get; set; }

        public string  Country { get; set; }

    }

}
Step5: Create a class for Database operation.
Here in this example, I have used Ado.net as database operation so we need to create a class for all database operations. Here I have created ‘db.cs’ class.
Go to Solutions Explorer > right click on project solution> Add New Folder > Enter Folder name (Here I rename it as ‘database_access_layer’) > right click on folder > Add new class.
Now write the following code snippet given below.
using System;

using System.Collections.Generic;

using System.Linq;

using System.Web;

using System.Data;

using System.Data.SqlClient;

using System.Configuration;

using AngularAutocomplete.Models;

namespace AngularAutocomplete.database_Access_layer

{

    public class db

    {

        SqlConnection con = new SqlConnection(ConfigurationManager.ConnectionStrings["con"].ConnectionString);


        public List<country> Get_Country()

        {

            List<country> listcountry = new List<country>();

            SqlCommand com = new SqlCommand("Sp_get_Country", con);

            com.CommandType = CommandType.StoredProcedure;

            con.Open();

            SqlDataReader dr = com.ExecuteReader();

            while (dr.Read())

            {

                country cn = new country();

                cn.Country_id = Convert.ToInt32(dr["Country_id"]);

                cn.Country = dr["Country"].ToString();

                listcountry.Add(cn);

            }

            con.Close();

            return listcountry;

        }

    }

}
Inside this class, we are using ADO.NET for database operation and retrieve all information.
Step6: Add JSON GET methods in the controller for getting the record from Get_Country method.
Here I have created following methods in HomeController,that has following code snippet:
using System;

using System.Collections.Generic;

using System.Linq;

using System.Web;

using System.Web.Mvc;

using AngularAutocomplete.Models;

namespace AngularAutocomplete.Controllers

{
    public class HomeController : Controller

    {
        public JsonResult get_country()

        {

            List<country> listcountry = dblayer.Get_Country();

            return Json(listcountry, JsonRequestBehavior.AllowGet);

        }
    }
}
Step8: Add New JS file for AngularJS Controller and AngularJS library file
Go to Solution Explorer > Create New folder (I rename as Resource)>Right Click on folder >Select JavaScript file > Enter name (I have to name as home.js) > Add.
Inside the Resources folder, keep the angular.min.js, angucomplete-alt.js, angucomplete-alt.css, bootstrap.min.css files for our use.
Now we write following code snippet into home.js
var app = angular.module("Homeapp", ['angucomplete-alt']);

 app.controller("HomeController", ['$scope', '$http', function ($scope,$http) {

    $scope.countries = [];

    $scope.SelectedCountries = null;


    $scope.AfterSelectedCoutries = function (selected) {

        if(selected){

            $scope.SelectedCountries = selected.originalObject;

        }

    }


    $http.get("/Home/get_country").then(function (d) {

        $scope.countries = d.data;

    }, function (error) {

        alert('Failed');

    })


}])
In the code given above, $scope.SelectedCountries stores the selected value in the text box. $http Service gets the data from the Server.
Step9: Add new action into the controller for show data from database.
Here I have added ‘Index’ into ‘HomeController’.
public ActionResult Index()

        {

            return View();

        }
Step10: Add view for action in controller & design.
Right Click on Action Method > Add View > Enter View Name > Select View Engine (Razor) > Add.
It has following code and design
@{

    Layout = null;

}
<!DOCTYPE html>


<html>

<head>

    <meta name="viewport" content="width=device-width" />

    <title>Index</title>

    <link href="~/Resource/bootstrap.min.css" rel="stylesheet" />

    <link href="~/Resource/angucomplete-alt.css" rel="stylesheet" />

</head>

<body>

    <div ng-app="Homeapp" ng-controller="HomeController">

        <div angucomplete-alt id="txtautocomplete" placeholder="Type Country name" pause="100" selected-object="AfterSelectedCoutries" local-data="countries" search-fields="Country" title-field="Country" minlength="1" input-class="form-control" match-class="highlight">


        </div>

        <div ng-show="SelectedCountries">

            Selected Country: {{SelectedCountries.Country}}

        </div>

    </div>


    <script src="~/Resource/angular.min.js"></script>

    <script src="~/Resource/angucomplete-alt.js"></script>

    <script src="~/Resource/home.js"></script>

</body>

</html>
In div element, we must add angucomplete-alt. We bind the data, using the local-data attribute.
Step 11: Run Application.
We have done all steps, Now It’s time to run the application

