


How to set up C# on Visual Studio Code ? | C# Tutorials
How to set up C# on Visual Studio Code? | C# Tutorials
In order to start with C# on your system, make sure that the .NET FRAMEWORK of the appropriate version is installed in the system.
Pre-requisite: Visual Studio Code is to be already installed
One can download the setup from the official website of Microsoft. Install the one which shows recommended for your system.
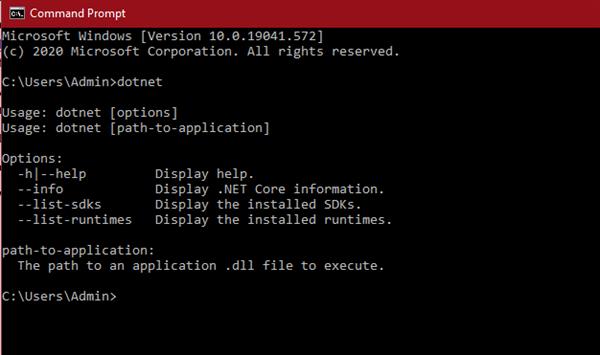
After installing the .net framework open the command prompt to check whether your system has dotnet or not.
Run the code
dotnetWhen it will run and if it is successful it will show the following output on the command prompt.
Once you get this output it means dotnet is successfully installed in the system, now we have to move on to creating a folder.
Create a folder and open it on the VSCode. After that open the terminal for that particular folder in the VSCode itself.
Insert the code
dotnet new consoleThis will take a few seconds and you can find that some files are installed or downloaded or loaded in that folder. Open it up and there will be a small program of C# already present. The end message in the terminal would be Restore Succeeded.
Now the C# is set up in the system, it is time to run and check.
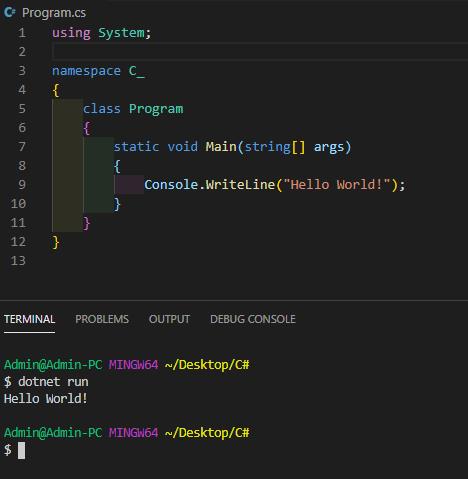
Get back to the terminal and insert the code
dotnet restoreThen insert
dotnet runThis will run the commands present in that C# program and give an output of Hello World (if no changes are made to the program file with the code).