


DEVELOPING CHROMIUM BASED BROWSER IN C#
INTRODUCTION TO CEFSHARP
In order to develop a Chromium-based browser, we need to use CefSharp in Windows Form Application. CefSharp stands for the Chromium embedded framework that helps us to create a chrome-based web browser. CefSharp allows us to integrate a chromium-based browser with our C# project thereby producing fully featured and standardized applications. CefSharp avails the browser controls and other controls (buttons, panels, inputs, etc. ) which can be customized by the programmer. It is a lightweight .NET wrapper around the Chromium embedded framework. About 30% of the bindings here are written in C++/CLI with the majority of code written in C#.
CefSharp is well suited for creating desktop applications with web technology-based components in the background. Moreover it enables the development of the chrome versed web browser which provides a high order of compatibility with the webpages written in distinguished scripts.
CREATING CHROMIUM BASED BROWSER
STEP 1: Open Visual Studio. Start with a new project in Windows form application giving it a relevant name.
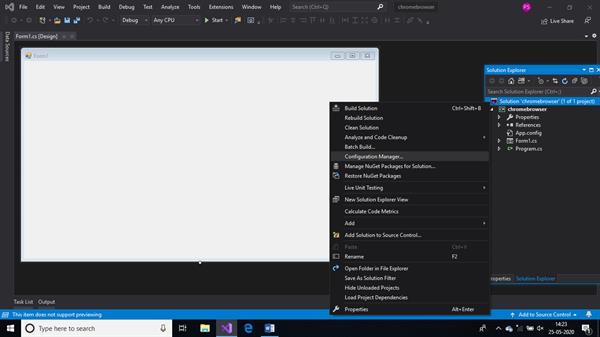
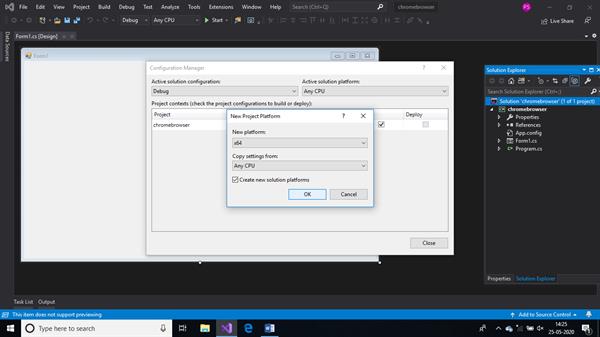
STEP 2: The application opens up a blank form. Before we start with anything else, we need to embed chromium into the current application. And also we need to change the platform configuration to make things work. Right-click on the solution, open configuration manager and set it to the 64-bit option according to the system.
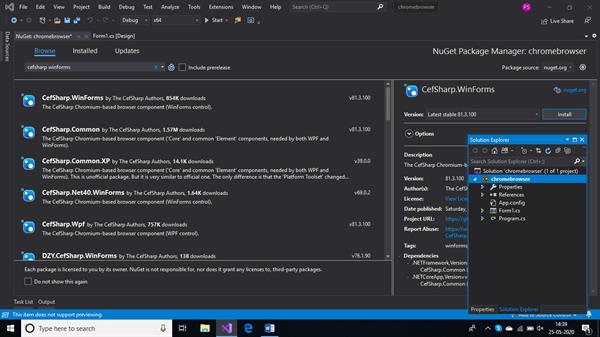
STEP 3: Right-click on the project name and select the manage NuGet package option, then browse it to download the CefSharp.WinForms. This will embed the chromium-browser to the current application. NuGet is a package management system that enables us to add, update, remove, explore external libraries into our applications. After the installation is done, we can start customizing the form according to our needs.
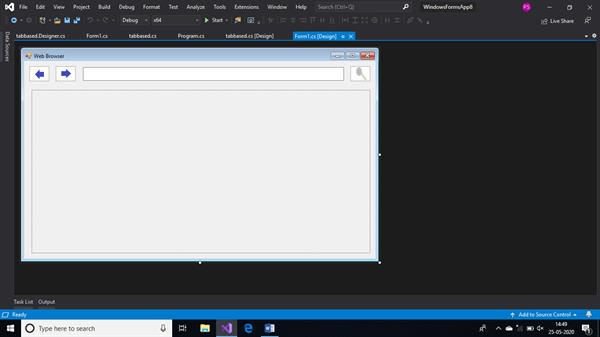
STEP 4: Now we start customizing the form according to us by adding various controls like back button, forward button, search button, textbox, and a panel. The panel enables us to include a collection of controls into it. It is a container to add controls at the runtime. The controls can be added from the toolbox and the names of these controls can be changed for convenience. Here, we added a picture box instead of the buttons to make our web browser look even more attractive. Images can easily be inserted into these picture boxes.
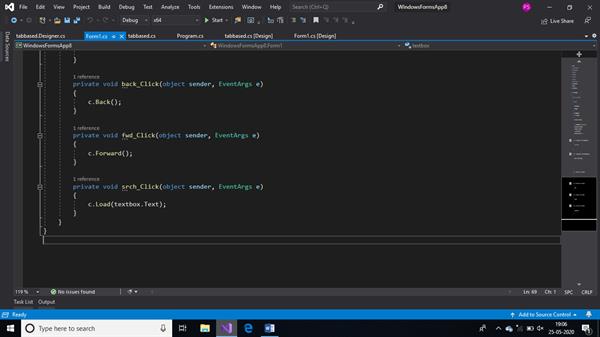
STEP 5: We are done with the structure, but we have to provide functioning to these controls. This can be done by double-clicking the controls which opens up the block of code for these controls. We write the code for the back button, forward button, and the search button using various methods like back ( ), forward( ), load( ).
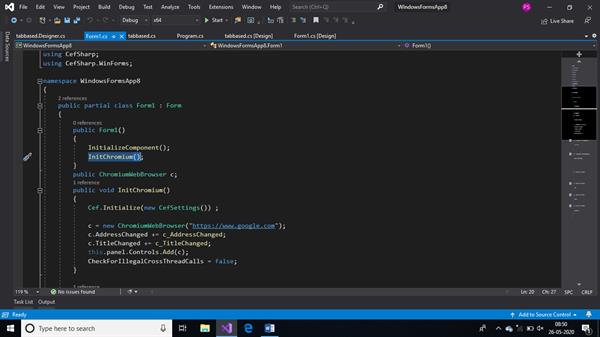
STEP 6: We need to import the namespaces CefSharp and CefSharp.WinForms in order to access varying assemblies. We define a method named InitChromium() to start the browser after initializing the global components. After that we initialize Chef with the provided settings. Also we need to create an object of the Chromium Browser class. This is because we did not involve any web browser in the structure and instead added the panel. So we create a browser component and add it to the form window. A URL is passed as a parameter so that when we execute the application it opens up a webpage.
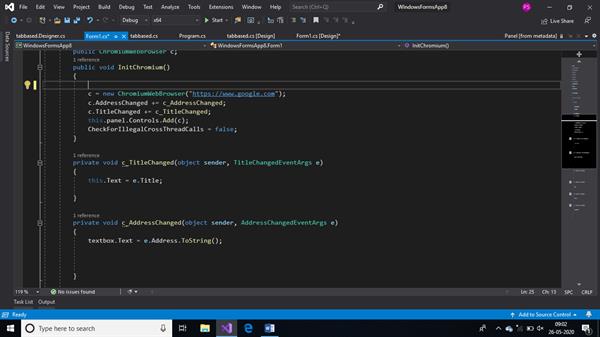
STEP 7: We open up the event “Address Changed”, in order to change the URLs in the text box as we continue navigating webpages and the event “Title Changed” to change the title of the document. We get the blocks of these events by entering the ‘object name’ dot operator ‘event name’ += and then pressing the Tab button twice. We even included the “CheckForIllegalCrossThreadCalls” property to handle the cross-thread operations.
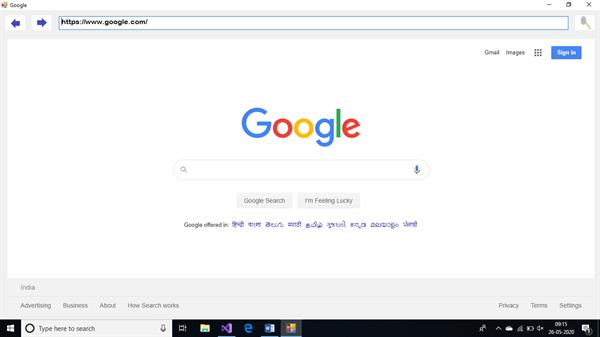
STEP 8: And now we are done with the chromium-based web browser. We can execute the code and see the results by building the solution.
SUMMARY
In this article we learned to develop a chromium-based web browser. We can even add various tab pages into our web browser using the tab controls making our application, even more, user friendly.
