


Create Web Browser in .NET Windows forms Using C#
WEB BROWSER CONTROL
The web browser control allows us to develop a web browser that enables the navigation between webpages through hyperlinks. This control, much like any other control has a number of features, properties, and events associated with it and provides event handlers to generate appropriate responses. The web browser control directs the user to the specified URL as soon as the application loads. We can even provide other controls to our application by utilizing various methods that allow traversing the webpages forward and backward maintaining a history. The Web Browser control also provides web browsing capabilities to the windows form application.
As soon as the application is loaded, it is directed to a URL that is already mentioned, and then as the user interacts with the buttons output is generated in the form of the web documents extracted from the server. The Web browser control involves the navigation that is possible with the Navigate( ) which comes within the pre-existing libraries.
CREATING WEB BROWSER
Now let’s implement these capabilities by developing a web browser in Windows Form Applications. We need to perform the following steps;-
STEP 1: Open Visual Studio and start with a new project selecting Windows Forms Application providing it an appropriate name.
STEP 2: The project opens up a form. Now we add various controls to this form using the toolbox. We dragged and dropped three buttons and a textbox to this form from the toolbox. The attributes of these controls can be modified by right-clicking and opening the properties. The controls added include a back button that has been named ‘back’, a forward button named ‘fwd’, and a search button named ‘search’. Apart from this, we added a textbox for the user to pass the URL which has been named ‘textbox’. It is always advised to change the names of the controls to make things convenient during coding.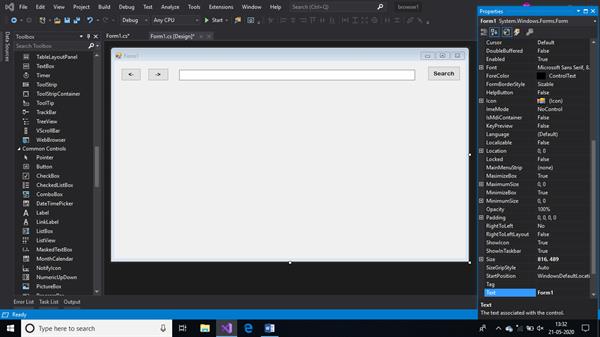
STEP 3: Now we need to add the web browser control which avails the browsing capabilities to our application. The web browser control can again be added from the toolbox and can be adjusted according to the form. We again change the name of this control as a ‘browser’. Now from the anchor attribute in properties we adjust the alignment of the browser with respect to the form window.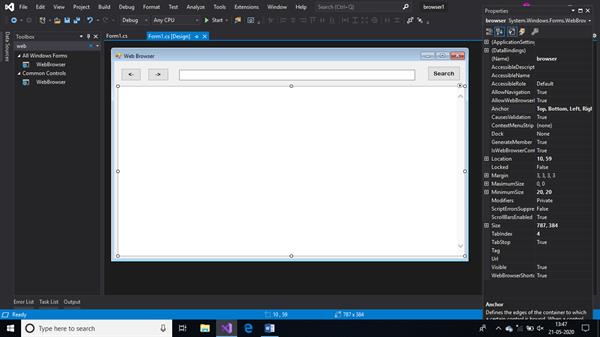
STEP 4: We are done with the design of our application but we need to provide these controls with actions. One by one, we double click on these controls and write the code to provide the controls with corresponding actions.

Here we provided an activity to the forward, backward, and search buttons by using GoBack( ), GoForward( ), and Navigate( ). These methods are predefined under the WebBrowser class in the pre-existing assemblies.
STEP 5: Now, we have to work on the load event. For this we open the properties and click the lightning bolt which opens up the events and then selects the load event. This event works as soon as our application is loaded. Here we need to write a code in this block such that the form is directed to a particular URL as soon as it is loaded. 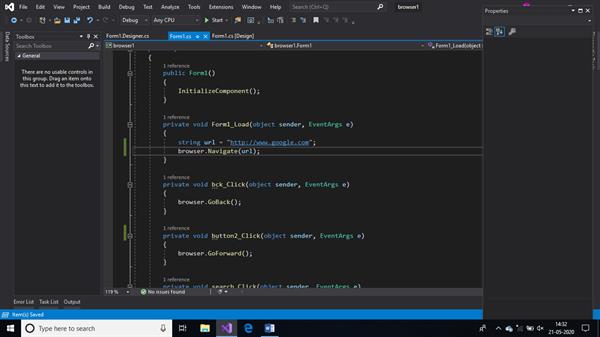
STEP 6: We would have observed the suggestions appearing below the search box while we type on the web browser. We can add the same ‘suggest and append’ option to our textbox for search by selecting the AutoComplete Mode and AutoComplete source in properties.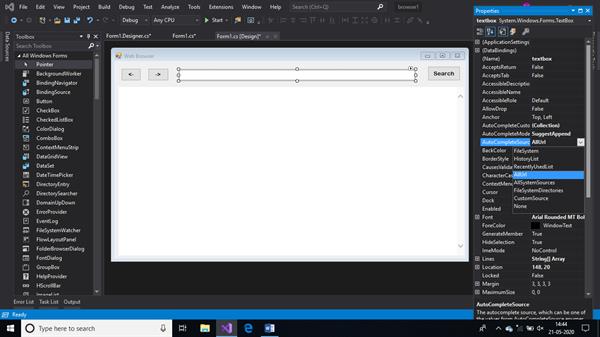
STEP 7: We would be familiar with the status bar and progress bar appearing at the bottom of a web page when a particular page is being loaded on the client’s system. We can also add the status bar and progress bar to our application. These controls can be added from the toolbox by adding
status strip -> status label -> progress bar.
After adding these controls we open up the event ‘Document completed’ from the properties. This event is triggered as soon as the document within the web browser control is fully loaded. We provide a code in this block such that the textbox is loaded with the URL of the page that has been recently loaded. This way the text box will be loaded with a new URL every time a new webpage appears. Also, we include the Title property in this block so that the title of the HTML document can be given to the web document loaded. Another event to be selected is Progress changed which contains the coding for the amount of the page loaded on the web browser control as we know that data is transmitted in packets.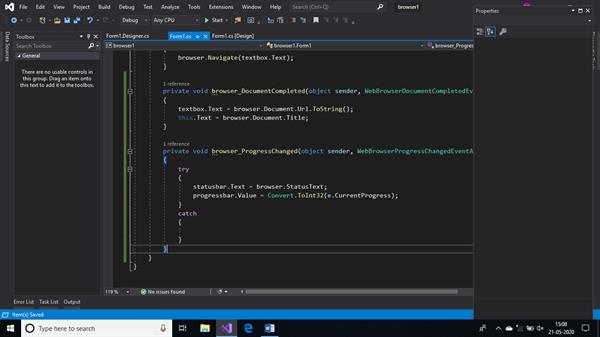
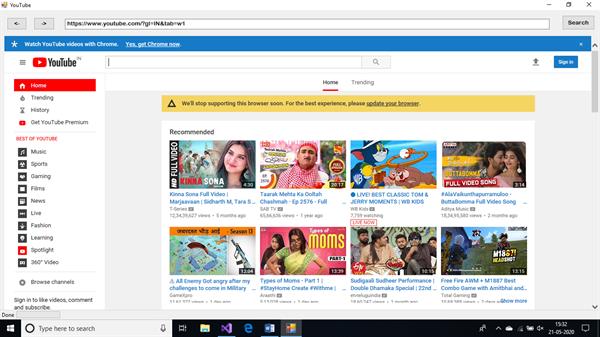
STEP 8: We can build the above project by pressing F5 and check the working of various controls we have integrated into the application.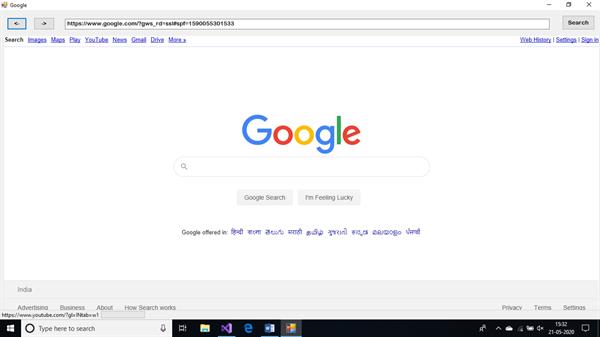
SUMMARY
In this article, we learned to develop a web browser using the web browser control in Windows Form Application. We studied various events and controls associated with the Web browser class which eases out the work of a programmer.
