


How to Implementing Two Factor Authentication in Asp.net MVC with Google Authenticator
Introduction:
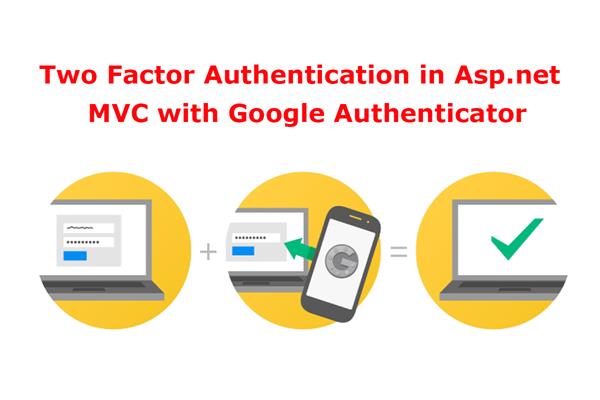
Today in this article, I will explain How to Implementing Two Factor Authentication in Asp.net MVC with Google authenticator
In this example, we will use Google Authenticator Application to Authenticate our application. Two factor authentication also protect the application from Brute force attack.
Google is introducing a new prompt that you can tap on your phone to approve login requests. It's very similar to how Twitter's two-factor authentication works, generating a notification that you accept from a phone and it approves the login attempt.
Ok, let’s start Two factor Authentication in Asp.net MVC with Authenticator
Follow these steps in order to implement “Two Factor Authentication in Asp.net MVC with Google Authenticator”
Step1: Create New Project.
Go to File > New > Project > Web > Asp.net MVC web project > Enter Application Name > Select your project location > click to add button > It will show new dialog window for select template > here we will select empty project > then click to Ok
Step2: Add Google Two Factor Nuget Package.
I have added Google Two Factor Authentication Nuget Package by right click on References and click to Manage Nuget Packages as the fallowing.


Step3: Create a controller.
Go to Solutions Explorer > right click on controller folder > Add Controller > Enter Controller name > Select template “empty MVC Controller” > Add.
Here I have created a controller “HomeController”
Step4: Add a new action from Login in your Controller.
Here I have added ‘Login’ Action in ‘HomeController’ as follows:
 public ActionResult Login()

        {

            return View();

        }
Step5: Add view for Login action and design.
Right click on Login action method > Add View > Enter View name > Select empty under template dropdown > Add
HTML Code
@{

    Layout = null;

}


<!DOCTYPE html>


<html>

<head>

    <meta name="viewport" content="width=device-width" />

    <title>Login</title>

    <link href="~/css/bootstrap.min.css" rel="stylesheet" />

</head>

<body>

    <form method="post">

        <div style="padding-top:50px;">

            <div class="row">

                <div class="col-sm-2"><label>User Name</label></div>

                <div class="col-sm-4"><input type="text" name="username" class="form-control" /></div>

                <div class="col-sm-2"></div>

            </div>

            <div class="help-block"></div>

            <div class="row">

                <div class="col-sm-2"><label>Password</label></div>

                <div class="col-sm-4"><input type="password" name="password" class="form-control" /></div>

                <div class="col-sm-6"></div>

            </div>

            <div class="help-block"></div>

            <div class="row">


                <div class="col-sm-2"></div>

                <div class="col-sm-4"><input type="submit" class="btn btn-success" /></div>

                <div class="col-sm-6"></div>

            </div>

        </div>

    </form>

</body>

</html>
Step6: Add another Login (Post Method) action method for verifying user credential.
Here I have created Login post action method for verifying user credential, If user authentication is successful then it transfer to VerifyAuth Action method for checking Two Factor authentication token
[HttpPost]

        public ActionResult Login(FormCollection fc)

        {

            if (fc["username"]=="Admin" && fc["password"]=="Admin123")

            {

                Session["tempid"] = fc["username"];

                return RedirectToAction("VerifyAuth");

            }

            else

            {

                return View();

            }


        }
Step7: Add an action for verifying two-factor authentication token
Here I have added action method for verifying two factor authentication token that generated by Google Authenticator mobile application and then user will transfer to their dashboard.
public ActionResult VerifyAuth()

        {

            if (Session["tempid"] == null)

            {

                return RedirectToAction("Login");

            }

            else

            {

                return View();

            }


        }

        string key = "test123!@@)(*";

        [HttpPost]

        public ActionResult VerifyAuth(FormCollection fc)

        {

            if (Session["tempid"] == null)

            {

                return RedirectToAction("Admin_Login");

            }

            var token = fc["passcode"];

            TwoFactorAuthenticator tfa = new TwoFactorAuthenticator();

            string UserUniqueKey = (Convert.ToString(Session["tempid"])+ key);

            bool isValid = tfa.ValidateTwoFactorPIN(UserUniqueKey, token);

            if (isValid)

            {

                Session["id"] = Convert.ToString(Session["tempid"]);


                return RedirectToAction("Myprofile");

            }


            return RedirectToAction("Login");

        }
Now we will add view for this ‘VerifyAuth’ action method as follows
@{

    Layout = null;

}


<!DOCTYPE html>


<html>

<head>

    <meta name="viewport" content="width=device-width" />

    <title>VerifyAuth</title>

</head>

<body>

    <div>

        <div align="center" style="width:100%">

            <div style="width:300px;"></div>

            <form method="post">

                <img src="~/googleauth.png" />

                <br />

                <input style="width:200px;" placeholder="Enter OTP here..." type="text" name="passcode" />

                <input type="submit" value="Login" class="btn btn-success" />

            </form>

        </div>

    </div>

</body>

</html>
Step8: Add an action for generating two factor authentication Barcode
I have added AdminQR action for generating Two factor authentication Bar Code for use in Google Authenticator mobile App for Setup account
You can install Google Authenticator android mobile application from here
public ActionResult AdminQR()

        {

if (Session["tempid"]!=null)

            {

                TwoFactorAuthenticator tfa = new TwoFactorAuthenticator();

                string UserUniqueKey = (Convert.ToString(Session["tempid"]) + key); //as  demo, I have done this way. But you should use any encrypted value here which will be unique value per user.

                Session["UserUniqueKey"] = UserUniqueKey;

                var setupInfo = tfa.GenerateSetupCode("Google Auth Test", Convert.ToString(Session["tempid"]), UserUniqueKey, 300, 300);

                ViewBag.BarcodeImageUrl = setupInfo.QrCodeSetupImageUrl;

                ViewBag.SetupCode = setupInfo.ManualEntryKey;

                return View();

            }

            else

            {

                return RedirectToAction("Login");

            }

}
Now I have added view for this action as follows
@{

    Layout = null;

}


<!DOCTYPE html>


<html>

<head>

    <meta name="viewport" content="width=device-width" />

    <title>AdminQR</title>

</head>

<body>

    <div>

        <div>

            <img src="@ViewBag.BarcodeImageUrl" />

        </div>

    </div>

</body>

</html>
Step9: Add an another action method for authorized user(My Profile)
I have added action method for authorized user when user credential is true
public ActionResult Myprofile()

        {

            if (Session["id"]!=null)

            {

                return View();

            }

            else

            {

                return RedirectToAction("Login");

            }


        }
Now I have added view for this action as follows
@{

    Layout = null;

}


<!DOCTYPE html>


<html>

<head>

    <meta name="viewport" content="width=device-width" />

    <title>Myprofile</title>

</head>

<body>

    <div>

        <h1>Welcome @Session["id"]</h1>

    </div>

</body>

</html>
Step10: Run Application
After providing accurate username and password, It will be asked for providing 6 digit Google authenticator code. For receiving this you will be scan generated Barcode from this view (AdminQR)
Open your Google Authenticator mobile application > Add an account > scan barcode > place bar code with red lines > Finish. Then you will get 6 digit code that will enter in the textbox of VerifyAuth page and click to login.


